
Blog & Notícias
Fique por dentro das últimas tendências e dicas de culinária.

Discover proven techniques to grow spicier peppers in your garden. Learn about crucial environmental factors, common mistakes, and expert tips to maximize capsaicin for fiery chilis.
Leia mais sobre este assunto incrível em nosso blog.
Ler Artigo
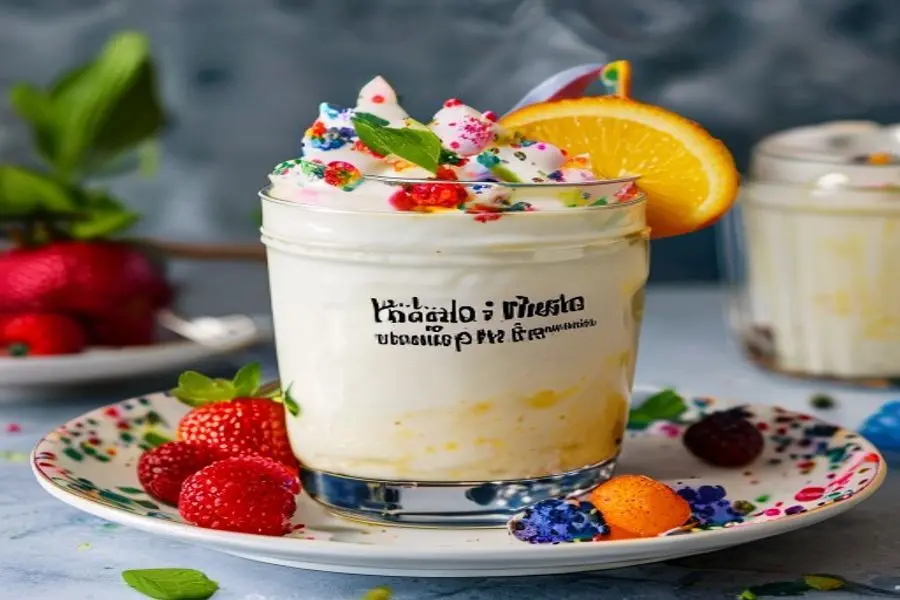
Recreate Luxury Smoothies at Home: The $20 Taste for Less
Leia mais sobre este assunto incrível em nosso blog.
Ler Artigo
Escondidinho de Carne Seca: O Sabor que Acolhe e Transforma
Leia mais sobre este assunto incrível em nosso blog.
Ler Artigo
Homemade Strawberry Streusel Cheesecake: Ultimate Guide
Leia mais sobre este assunto incrível em nosso blog.
Ler Artigo
Além do Básico: 31 Sanduíches para Cada Desejo
Leia mais sobre este assunto incrível em nosso blog.
Ler Artigo
Unlock grilling perfection! Compare wood charcoal & coconut shell charcoal: learn differences, pros, cons, and expert tips for superior flavor & heat control. A chef's guide.
Leia mais sobre este assunto incrível em nosso blog.
Ler Artigo
Trader Joe's 3-Ingredient Dip: Quick, Creamy, Delicious
Leia mais sobre este assunto incrível em nosso blog.
Ler Artigo
Pho Caseiro Que Supera Expectativas: Sabor de Miami
Leia mais sobre este assunto incrível em nosso blog.
Ler Artigo
Patatas Bravas Recipe: Crispy, Spicy & Unforgettable Tapa
Leia mais sobre este assunto incrível em nosso blog.
Ler Artigo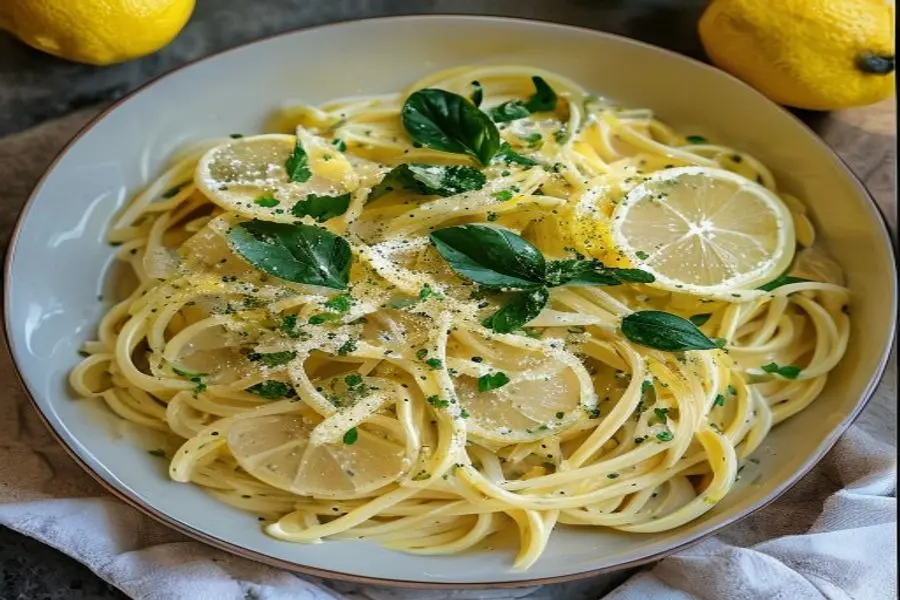
Macarrão Cremoso de Limão e Ervas: Leveza Irresistível
Leia mais sobre este assunto incrível em nosso blog.
Ler Artigo
Pastel Crocante Perfeito: Sabores da Feira na Sua Casa
Leia mais sobre este assunto incrível em nosso blog.
Ler Artigo
Ultimate Loaded Nachos: Recipe for Global Flavor Success
Leia mais sobre este assunto incrível em nosso blog.
Ler Artigo
Perfect Frozen Foods: Prevent Freezer Burn
Leia mais sobre este assunto incrível em nosso blog.
Ler Artigo
Peixes e Frutos do Mar: Leveza Irresistível para o Seu Prato
Leia mais sobre este assunto incrível em nosso blog.
Ler Artigo

Beetroot & Goat Cheese Tartlets: Award-Winning Flavor
Leia mais sobre este assunto incrível em nosso blog.
Ler Artigo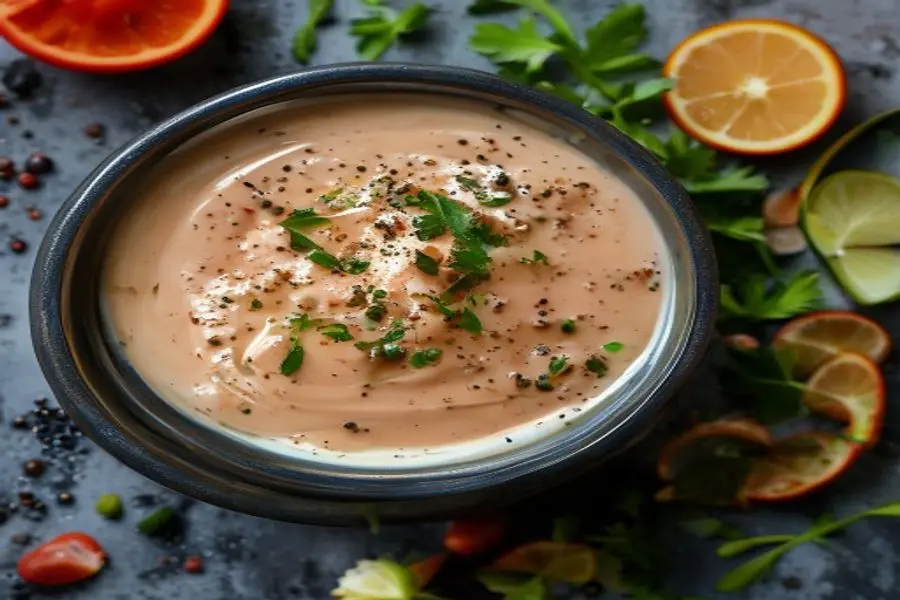
Craft vibrant, homemade Italian dressing in minutes! This easy recipe uses pantry staples, offering fresh flavors for salads, marinades, & more. Skip the store, make your own!
Leia mais sobre este assunto incrível em nosso blog.
Ler Artigo
Classic Diner Meatloaf Recipe | Ultimate Comfort Food
Leia mais sobre este assunto incrível em nosso blog.
Ler Artigo
Brazilian Brigadeiro Bliss: Gourmet Chocolate Truffles
Leia mais sobre este assunto incrível em nosso blog.
Ler Artigo
Mediterranean Mezze Platter: Quick, Easy, & Elegant Entertaining
Leia mais sobre este assunto incrível em nosso blog.
Ler Artigo
Velvety Chocolate Chia Pudding | Healthy Dessert Recipe
Leia mais sobre este assunto incrível em nosso blog.
Ler Artigo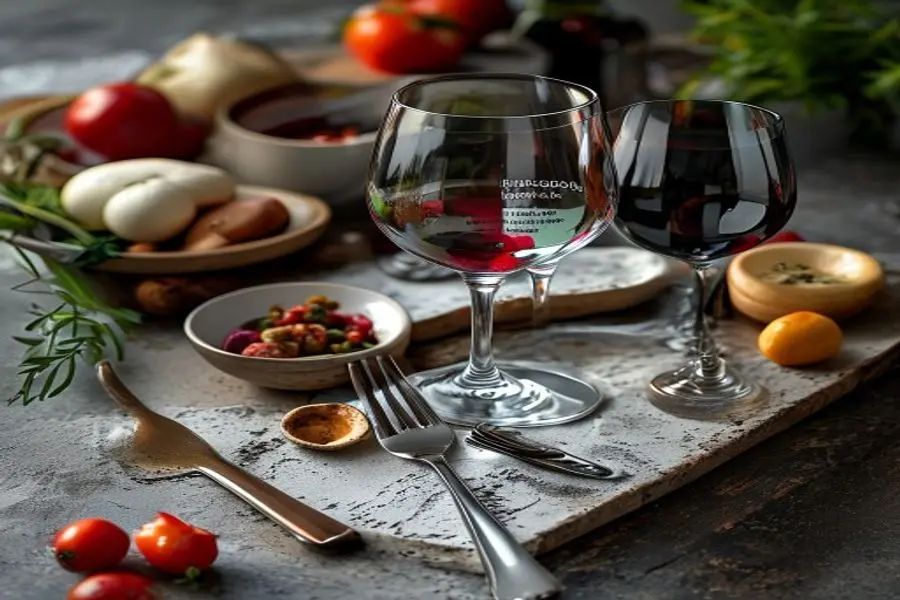
Decifre o Garfo e Taça: Segurança Alimentar na Cozinha
Leia mais sobre este assunto incrível em nosso blog.
Ler Artigo
Pufes Perfeitos: Delícia de Dutch Baby de Mirtilo e Limão
Leia mais sobre este assunto incrível em nosso blog.
Ler Artigo
Broiler Dinners: Quick, Flavorful Summer Meals No Grill
Leia mais sobre este assunto incrível em nosso blog.
Ler Artigo

'90s Homestyle Tomato Pasta: Authentic & Easy Recipe
Leia mais sobre este assunto incrível em nosso blog.
Ler Artigo
Bar Shrimp Manchester: Scallop Tartare Home Recipe
Leia mais sobre este assunto incrível em nosso blog.
Ler Artigo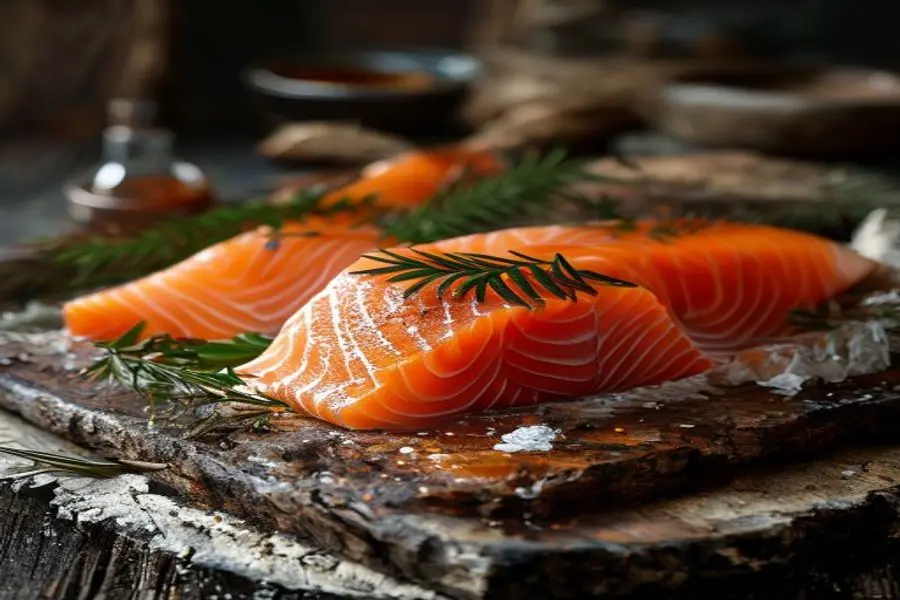
Artesanato do Salmão Curado: Um Clássico Nórdico, Perfeito em Casa
Leia mais sobre este assunto incrível em nosso blog.
Ler Artigo
Skillet Cornbread: South Side Soul & Honey-Chili Butter Recipe
Leia mais sobre este assunto incrível em nosso blog.
Ler Artigo
Discover the secret to modern Parisian cuisine with this exquisite vegetable-forward dish. Fresh, vibrant, and surprisingly easy to master at home. A culinary journey awaits!
Leia mais sobre este assunto incrível em nosso blog.
Ler Artigo
Prepara en casa la bebida de coco azul viral con sabor y atractivo visual superiores. Guía completa con consejos de chef y variaciones.
Leia mais sobre este assunto incrível em nosso blog.
Ler Artigo
Desvende o Paladar: O Poder da Linguagem do Vinho
Leia mais sobre este assunto incrível em nosso blog.
Ler Artigo
Focaccia Sem Esforço: Sabor Divino e Zero Habilidade no Forno
Leia mais sobre este assunto incrível em nosso blog.
Ler Artigo
Discover the Hugo Spritz, summer's reigning cocktail. This guide covers the recipe, chef tips, and variations for the perfect breezy drink.
Leia mais sobre este assunto incrível em nosso blog.
Ler Artigo
<h2>Unforgettable Miami Fiesta Tacos: Elevate Your Summer</h2> <p>Summer truly feels like pure magic, offering the perfect backdrop for vibrant culinary adventures. Imagine sun-kissed evenings, the gentle hum of conversation, and the irresistible aroma of sizzling tacos filling the air. This premium recipe for Miami Fiesta Tacos is designed to capture that exhilarating spirit, bringing a taste of tropical celebration directly to your table.</p> <p>These tacos are the ultimate choice for transforming any ordinary evening into a spectacular fiesta. They are perfect for spontaneous backyard gatherings, weekend celebrations, or simply when you crave an explosion of fresh, zesty flavors. Prepare them when you want to impress guests or treat your family to an experience beyond the everyday dinner routine.</p> <p>This recipe is ideally suited for anyone who cherishes entertaining, loves bold Mexican-inspired cuisine, or simply seeks a culinary escape. Whether you're a seasoned home cook or an enthusiastic beginner, our detailed guide ensures success. You’ll create an unforgettable meal that embodies the joyful essence of summer, making every bite a celebration.</p> <h3>Why This Recipe Is So Successful?</h3> <p>This recipe for Miami Fiesta Tacos consistently delights because it perfectly blends irresistible flavors with remarkable practicality. Each component contributes to a harmonious taste experience, from the perfectly seasoned protein to the vibrant, refreshing toppings. It’s a sensory journey that evokes warm weather and festive atmospheres, making it incredibly appealing for diverse palates.</p> <p>The success also stems from its inherent flexibility, allowing for customization to suit various dietary preferences and ingredient availability. In simple terms, many elements can be made ahead of time, significantly reducing stress on the day of your event. This thoughtful design ensures that both the cook and the guests can fully immerse themselves in the celebration, enjoying delectable food without fuss.</p> <p>The secret to this recipe is the layers of flavor—from the zesty, spicy marinade to the freshness of the pico de gallo and the creamy avocado crema. These distinct elements combine to create a dynamic and satisfying taco experience. Each bite delivers a burst of authentic taste, making these tacos a consistent crowd-pleaser that truly stands out.</p> <h3>Ingredients Explained</h3> <p>Crafting exceptional Miami Fiesta Tacos starts with selecting high-quality ingredients, each playing a vital role in the final flavor profile.</p> <ul> <li><strong>Chicken Fillets or Shrimp:</strong> These provide the lean, savory protein base, absorbing marinades beautifully for tender, flavorful bites.</li> <li><strong>Corn or Flour Tortillas:</strong> The essential vessel for your tacos; corn offers authentic flavor, while flour provides a softer, more pliable texture.</li> <li><strong>Lime and Orange:</strong> Citrus juices form the backbone of the marinade, tenderizing the protein and adding a bright, tangy zest.</li> <li><strong>Fresh Cilantro:</strong> A crucial herb that brings a clean, herbaceous, and refreshing counterpoint to richer flavors.</li> <li><strong>Jalapeño or Serrano Pepper:</strong> Delivers a balanced kick of heat, enhancing the overall vibrancy without overpowering the dish.</li> <li><strong>Red Onion and Bell Peppers:</strong> Add a subtle sharpness, sweetness, and beautiful visual appeal to the fresh salsas and toppings.</li> <li><strong>Ripe Avocado:</strong> Forms the creamy, rich base for a luscious avocado crema, essential for balancing the dish's acidity and spice.</li> <li><strong>Olive Oil:</strong> Used for cooking, it helps develop a golden sear on the protein and emulsifies dressings and marinades.</li> <li><strong>Spices (Cumin, Paprika, Garlic Powder):</strong> These spices build a complex, aromatic foundation for the marinade, defining the taco's core flavor.</li> </ul> <h3>Complete Step-by-Step</h3> <ol> <li><strong>Prepare the Marinade:</strong> In a medium bowl, combine lime and orange juices, olive oil, chopped cilantro, minced garlic, cumin, paprika, salt, and pepper. Mix well until all seasonings are incorporated.</li> <li><strong>Marinate the Protein:</strong> Add sliced chicken fillets or peeled shrimp to the marinade. Cover and refrigerate for at least 30 minutes, ideally 1-2 hours for chicken, or 15-20 minutes for shrimp.</li> <li><strong>Cook the Protein:</strong> Heat a drizzle of olive oil in a large skillet over medium-high heat. Remove protein from the marinade (discard any remaining marinade) and cook for 4-6 minutes per side for chicken, or 2-3 minutes per side for shrimp, until golden and cooked through. Rest for a few minutes, then shred or chop the chicken if desired.</li> <li><strong>Prepare Fresh Pico de Gallo:</strong> In another bowl, combine diced tomatoes, finely chopped red onion, minced jalapeño (seeded if preferred), fresh cilantro, and lime juice. Season with salt to taste and set aside.</li> <li><strong>Make the Avocado Crema:</strong> In a blender or food processor, add ripe avocados, Greek yogurt (or sour cream), lime juice, fresh cilantro, and a pinch of salt. Blend until smooth and creamy.</li> <li><strong>Warm the Tortillas:</strong> Heat tortillas in a dry skillet over medium heat for about 30 seconds per side, until soft and slightly toasted. Alternatively, wrap in foil and warm in the oven.</li> <li><strong>Assemble the Tacos:</strong> Place a spoonful of cooked protein in the center of each warm tortilla. Add a generous spoonful of fresh pico de gallo and top with avocado crema. Finish with lime wedges and more fresh cilantro, if desired.</li> </ol> <h3>Chef's Tips</h3> <p>Achieving restaurant-quality tacos at home is simpler with a few expert techniques. Focusing on ingredient quality and preparation can elevate your entire dish. These small adjustments make a significant difference in flavor and presentation, ensuring a professional touch.</p> <blockquote>An expert culinary tip: Always char your tortillas slightly, either over an open flame or in a hot, dry skillet. This intensifies their flavor and makes them more pliable, preventing them from breaking when folded, a crucial step for the best taco experience.</blockquote> <ul> <li><strong>Mise en Place is Key:</strong> The most important tip is to prepare all your ingredients (chopped, sliced) before you start cooking. This ensures a smooth and stress-free flow in the kitchen, especially when assembling multiple tacos for a fiesta.</li> <li><strong>Deep Flavor Marinade:</strong> For even more flavorful chicken, prick the meat with a fork before marinating. This allows juices and seasonings to penetrate deeper. For shrimp, do not marinate for more than 20 minutes to avoid a mushy texture.</li> <li><strong>Balance Flavors:</strong> The professional technique is to taste and adjust seasonings in each component individually. Ensure your protein is well-seasoned, your pico de gallo vibrant, and your avocado crema rich yet balanced with acidity.</li> <li><strong>Warm Tortillas Correctly:</strong> Do not skip this step. Properly warmed tortillas are flexible and delicious. Overheating them will make them brittle; underheating them leaves them cold and flavorless. A slight char is ideal.</li> </ul> <h3>Common Mistakes</h3> <p>Even seasoned cooks can stumble with tacos if certain details are overlooked. Recognizing and avoiding these frequent pitfalls will save your fiesta from any culinary mishaps. Focus on these points to ensure your Miami Fiesta Tacos are nothing short of perfect and stress-free for everyone.</p> <ul> <li><strong>Overstuffing Tacos:</strong> The most common mistake is piling too much filling into each tortilla. This not only makes them difficult to eat but can also cause the tortilla to tear. Keep portions reasonable.</li> <li><strong>Cold or Brittle Tortillas:</strong> Not warming tortillas adequately results in a cold, stiff base that breaks when folded. Invest time to heat them for the ideal texture.</li> <li><strong>Bland or Dry Protein:</strong> Insufficient marinating or overcooking the meat can lead to flavorless and dry filling. Follow recommended marinating and cooking times.</li> <li><strong>Watery Salsas:</strong> Not draining excess liquid from tomatoes or onions in your pico de gallo can result in soggy tacos. Allow chopped vegetables to drain slightly before mixing.</li> <li><strong>Lack of Texture Contrast:</strong> Tacos are about the experience. Failing to include crunchy elements (like thinly sliced cabbage) or creamy ones (like the crema) can make the taco monotonous.</li> </ul> <h3>Recipe Variations</h3> <p>The beauty of tacos lies in their versatility, allowing for endless customization to suit different tastes and dietary needs. These variations ensure that everyone at your fiesta can enjoy delicious, personalized options. Experiment with different proteins, vegetables, and flavors to create your unique taco experience.</p> <ul> <li><strong>Healthy Version:</strong> Use lean grilled chicken or baked white fish, plenty of leafy greens as a base, and a lighter salsa without crema. Opt for whole wheat tortillas.</li> <li><strong>Economical Version:</strong> Substitute protein with seasoned black beans or lentils, add more seasonal vegetables, and use a simple tomato and onion salsa.</li> <li><strong>Vegan Version:</strong> Swap chicken/shrimp for grilled portobello mushrooms, sliced avocados, or a black bean and corn mix. Use a cashew cream or pure avocado mash as a topping.</li> <li><strong>Gourmet Version:</strong> Utilize jumbo shrimp, seared scallops, or slow-roasted pork (carnitas). Add a mango-habanero salsa and a cojita cheese crema.</li> </ul> <h3>How to Serve and Store</h3> <p>For a true Miami Fiesta experience, presentation is key. Serve your tacos buffet-style, allowing guests to build their own. Arrange the warm tortillas, cooked protein, pico de gallo, avocado crema, and extra lime wedges in separate bowls. This interactive approach encourages customization and keeps all components fresh and appealing.</p> <p>To store, keep each component separately in airtight containers in the refrigerator. Cooked protein lasts up to 3 days, while pico de gallo and avocado crema should be consumed within 1-2 days. Tortillas can be stored at room temperature or refrigerated in their original packaging. Reheat protein gently on the stovetop or in the microwave before serving again.</p> <h3>Google SEO Block</h3> <p><strong>Prep Time:</strong> 25 minutes (plus 30-120 minutes marinating)</p> <p><strong>Cook Time:</strong> 15-20 minutes</p> <p><strong>Total Time:</strong> 40-45 minutes (excluding marinating)</p> <p><strong>Yield:</strong> 8-10 tacos (serves 4-5 people)</p> <p><strong>Difficulty Level:</strong> Easy to Moderate</p> <p><strong>Approximate Calories per Taco:</strong> 280-350 calories (varies based on ingredients and portions)</p> META_DESC_EN
Leia mais sobre este assunto incrível em nosso blog.
Ler Artigo
Mousse de Chocolate em Minutos: O Segredo do Tofu Sedoso
Leia mais sobre este assunto incrível em nosso blog.
Ler Artigo
Os principais motivos desse eu cook are: o alto volume de novos locais cada mês, ingredientes de qualidade e aperfeiçoamento constante de receitas. O sabor irresistível e a seleção variada são os pilares que atraem clientes e transformam visitas em maravilhas gastronômicas.
Leia mais sobre este assunto incrível em nosso blog.
Ler Artigo
Doçura Aveludada: O Segredo do Brigadeiro Perfeito em Casa
Leia mais sobre este assunto incrível em nosso blog.
Ler Artigo
Unlock the secrets to crafting the ultimate butter pecan ice cream, a beloved classic with depth and delightful crunch.
Leia mais sobre este assunto incrível em nosso blog.
Ler Artigo
Jantar em 15: A Receita de Salmão que Sempre Vence
Leia mais sobre este assunto incrível em nosso blog.
Ler Artigo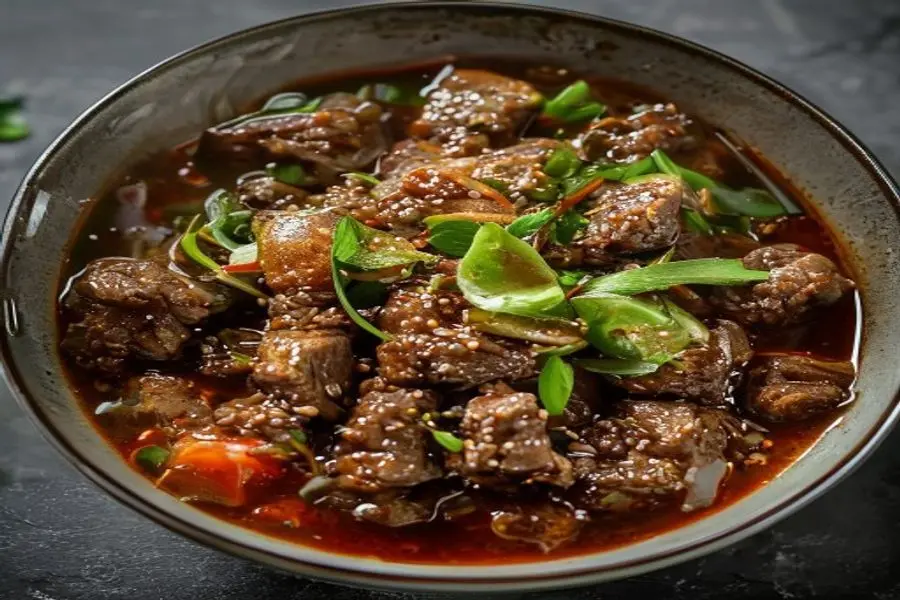
Carne Moída ao Curry e Missô: Stir-fry Umami, Vitória na Semana
Leia mais sobre este assunto incrível em nosso blog.
Ler Artigo
Choosing between chicken and salmon? Dive into a detailed nutritional comparison to find the ideal protein for your health goals, cooking style, and budget.
Leia mais sobre este assunto incrível em nosso blog.
Ler Artigo
Roasted Strawberry Rhubarb Pie: Ultimate Flavor Guide
Leia mais sobre este assunto incrível em nosso blog.
Ler Artigo
Master the art of cookie cake with our expert guide. Discover the secrets to a perfectly chewy, crisp, and irresistible chocolate chip cookie cake for any occasion. Quick and easy!
Leia mais sobre este assunto incrível em nosso blog.
Ler Artigo
Master Crispy, Tangy Buffalo Wings: Game Day Perfection
Leia mais sobre este assunto incrível em nosso blog.
Ler Artigo
Dominando o Fogão: Por Que Chefs Amam o Aço Carbono
Leia mais sobre este assunto incrível em nosso blog.
Ler Artigo
Authentic Goan Prawn Curry Recipe | NYC Culinary Experience
Leia mais sobre este assunto incrível em nosso blog.
Ler Artigo
Gero Fasano: Paz na Cozinha, Pratos Perfeitos à Mesa
Leia mais sobre este assunto incrível em nosso blog.
Ler Artigo
Uncover the humble yet beloved 2-ingredient sandwich from WWII, a timeless classic still cherished today. Easy recipe, tips, and variations await!
Leia mais sobre este assunto incrível em nosso blog.
Ler Artigo
Pamonha Seda Perfeita: Sabor Junino Autêntico na Sua Mesa
Leia mais sobre este assunto incrível em nosso blog.
Ler Artigo
Unleash wok hei's magic! Learn the professional techniques, ingredients, and common mistakes to achieve authentic smoky stir-fries, like Beef Chow Fun, in your kitchen.
Leia mais sobre este assunto incrível em nosso blog.
Ler Artigo
Tortuga Savory Tart: Layers of Flavor, Unforgettable Taste
Leia mais sobre este assunto incrível em nosso blog.
Ler Artigo

Unlock the secret to the best Loose Meat Sandwich with our easy, chef-approved recipe. A classic Midwest fast food, perfected at home for ultimate comfort.
Leia mais sobre este assunto incrível em nosso blog.
Ler Artigo
Sanduíche na Brasa: Crocância Defumada e Recheio Incomparável
Leia mais sobre este assunto incrível em nosso blog.
Ler Artigo
Master the art of chocolate mousse with our chef-approved recipe. Achieve a silky, rich, and airy dessert perfect for any occasion, from casual to gourmet. Includes pro tips and variations.
Leia mais sobre este assunto incrível em nosso blog.
Ler Artigo
Feijoada Autêntica: O Espírito do Carnaval em Cada Garfada
Leia mais sobre este assunto incrível em nosso blog.
Ler Artigo
Omelete de Alface Multicamadas: O Segredo Viral das Sobras
Leia mais sobre este assunto incrível em nosso blog.
Ler Artigo
Néctar da Videira: A Harmonia Doce e Ácida da Uva
Leia mais sobre este assunto incrível em nosso blog.
Ler Artigo

Best Homemade Strawberry Rhubarb Pie Recipe Guide
Leia mais sobre este assunto incrível em nosso blog.
Ler Artigo
Recreate the high-end Erewhon strawberry drink experience yourself. Get the full recipe, chef tips, and save money on this vibrant, healthy elixir.
Leia mais sobre este assunto incrível em nosso blog.
Ler Artigo
<h2>Fresh Crumbs: The Homemade Secret for Irresistible Dishes</h2>\n<p>Forget bland store-bought versions! Preparing bread crumbs at home is a small gesture that makes a monumental difference in taste. These golden, crispy nuggets are the perfect invitation to elevate your daily meals. Add a chef's touch, transforming simple ingredients into memorable dishes with ease.</p>\n<p>When you're looking for that perfect crunch in a casserole, the freshness of a crispy breading, or a spectacular finishing touch on a salad, this recipe is your ally. It's the ideal solution to use up leftover bread, preventing waste and enriching your culinary repertoire. Get ready to surprise everyone with your skills!</p>\n<p>This recipe is for the home cook who values flavor and practicality, and for those looking for a smart way to repurpose food. In simple terms: it's the perfect foundation for anyone who wants to go further in the kitchen without complication. Children and adults alike will appreciate the special touch that only fresh crumbs can offer.</p>\n\n<h3>WHY IS THIS RECIPE SO SUCCESSFUL?</h3>\n<p>The success of this recipe lies in its simplicity combined with a huge impact on food flavor and texture. It offers an incomparable crispness, a freshness that industrialized bread crumbs cannot replicate. Furthermore, its versatility allows you to customize it with seasonings, creating everything from a neutral version to an explosion of Italian flavors that will fill your kitchen with delightful aromas.</p>\n\n<h3>INGREDIENTS EXPLAINED</h3>\n<ul>\n <li><strong>Stale bread (various types):</strong> The base of the recipe. Denser breads like ciabatta or baguette produce more structured crumbs. Common white breads result in finer, lighter crumbs, ideal for delicate coatings.</li>\n <li><strong>Extra virgin olive oil:</strong> Essential for adding moisture before baking, contributing to the golden color and flavor. It aids in caramelization and achieving that perfect crunch.</li>\n <li><strong>Garlic powder (optional):</strong> An aromatic touch that adds depth. Enhances the flavor without overpowering the bread's natural taste, creating a harmonious blend.</li>\n <li><strong>Onion powder (optional):</strong> Complements the garlic, bringing a subtle sweetness and an umami flavor that appeals to most palates, enhancing the overall profile.</li>\n <li><strong>Smoked paprika (optional):</strong> Imparts color and a smoky, slightly spicy flavor. Perfect for enhancing dishes with meats or vegetables, adding a unique dimension.</li>\n <li><strong>Dried oregano (optional):</strong> A classic Italian seasoning, offering an herbaceous aroma and distinct flavor, ideal for a Mediterranean touch in your cooking.</li>\n <li><strong>Salt and black pepper to taste:</strong> Fundamental for enhancing all other flavors and balancing the seasoning, allowing you to adjust to your preferred palate for optimal taste.</li>\n</ul>\n\n<h3>COMPLETE STEP-BY-STEP</h3>\n<ol>\n <li>Preheat the oven to 150°C (300°F). This low temperature is ideal for slowly dehydrating the bread without burning it, ensuring optimal crispness.</li>\n <li>Cut the stale bread into small, uniform cubes. This ensures that the crumbs bake evenly and facilitates processing. The secret to this recipe is: to cut the bread into pieces before processing, not after.</li>\n <li>Spread the bread cubes in a large baking sheet. Make sure they are not crowded, allowing hot air to circulate well around all pieces for even drying.</li>\n <li>Bake for 15-20 minutes, or until the cubes are dry and slightly crisp. They don't need to be golden yet. Remove from the oven and let cool completely before proceeding.</li>\n <li>Transfer the dried bread to a food processor. Process in short pulses until you achieve the desired consistency for your crumbs, whether finer or coarser.</li>\n <li>Return the processed crumbs to the baking sheet. Drizzle with olive oil and, if using, add the seasonings (garlic powder, onion powder, paprika, oregano, salt, pepper). Mix well to coat all crumbs evenly.</li>\n <li>Return the baking sheet to the oven for another 10-15 minutes, stirring occasionally, until the crumbs are golden and very crispy. The professional technique is: do not rush this step, allowing them to brown uniformly for deep flavor.</li>\n <li>Remove from the oven and let cool completely before storing. This is crucial to ensure crispness and prevent them from becoming soggy in storage, prolonging their shelf life.</li>\n</ol>\n\n<h3>CHEF'S TIPS</h3>\n<blockquote>chef's culinary tip: For extra fine and gluten-free crumbs, use gluten-free bread and process for longer. Add lemon zest or grated Parmesan cheese in the second baking step for a surprising citrusy or umami touch.</blockquote>\n<p>The most important tip is: do not overcrowd the food processor. Process the bread in small batches to ensure uniform grinding and prevent some parts from remaining too large. This also extends the lifespan of your appliance and ensures an ideal texture.</p>\n<p>Experiment with different types of bread. Each one imparts a unique flavor and texture profile to your crumbs. Whole wheat bread brings a more rustic and healthy flavor, while white bread can be more neutral and subtle. The base of your crumb defines the flavor potential of your final dish.</p>\n\n<h3>COMMON MISTAKES</h3>\n<ul>\n <li><strong>Using overly fresh bread:</strong> Fresh bread has too much moisture and doesn't crumble well, resulting in a paste instead of crispy crumbs. The most common mistake is: not letting the bread dry enough before processing, compromising the texture.</li>\n <li><strong>Baking at too high a temperature:</strong> Burns the crumbs on the outside before they dry on the inside, leaving them bitter and with an unpleasant taste.</li>\n <li><strong>Not spreading the bread evenly on the baking sheet:</strong> Some parts burn while others do not dry, resulting in an inconsistent final product that lacks uniformity.</li>\n <li><strong>Storing hot or moist crumbs:</strong> This leads to condensation and loss of crispness, as well as promoting mold growth and spoiling the product quickly.</li>\n <li><strong>Overcrowding the food processor:</strong> Results in uneven crumbs or an overheated appliance, potentially damaging it and producing an undesirable texture.</li>\n</ul>\n\n<h3>RECIPE VARIATIONS</h3>\n<p>For a <strong>healthy version</strong>, use whole wheat bread and toast it with a drizzle of olive oil and fresh herbs like thyme or rosemary. The extra fiber and antioxidants elevate the nutritional value, perfect for soups and salads, adding freshness and flavor.</p>\n<p>Looking for an <strong>economical version</strong>? Simply use any type of leftover bread you have at home, cleverly preventing waste. Day-old bakery breads are excellent and often cheaper. Add only salt and pepper to keep costs low and the flavor authentic, utilizing what you already have.</p>\n<p>The <strong>vegan version</strong> is naturally covered by this recipe, provided the bread used is free of animal-derived ingredients. For an extra flavor boost, add nutritional yeast for an umami "cheesy" taste that will pleasantly surprise you, enhancing the vegan profile.</p>\n<p>For a <strong>gourmet version</strong>, mix the crumbs with freshly grated Parmigiano Reggiano cheese, Sicilian lemon zest, and red pepper flakes. Perfect for finishing pasta, risottos, or baked fish, this combination elevates the dish to another level of sophistication and taste.</p>\n\n<h3>HOW TO SERVE AND STORE</h3>\n<p>Homemade bread crumbs are incredibly versatile. Use them to bread chicken, fish, or vegetables, sprinkle them over creamy pasta, fresh salads, velvety soups, or as the crispy topping for gratinated casseroles. They transform any dish with their unparalleled texture and flavor, making every bite special.</p>\n<p>To store, make sure the crumbs are completely cool. Keep them in an airtight container at room temperature for up to 1 week, or in the refrigerator for up to 2 weeks, maintaining their crispness. For longer periods, freeze them for up to 3 months. Thaw at room temperature or quickly reheat in the oven to restore their original crispness.</p>\n\n<h3>SEO BLOCK FOR GOOGLE</h3>\n<p>Prepare homemade bread crumbs in about <strong>20 minutes of active prep time</strong>, plus 25-35 minutes of baking time, yielding approximately 2-3 cups (about 200-300g of crumbs). The <strong>difficulty level</strong> is easy, ideal for all cooks, from beginners to experienced chefs. The <strong>approximate caloric value</strong> varies depending on the type of bread, but a 1/4 cup serving (without extra seasonings) has about 80-100 calories, a great tasty complement.</p>\n
Leia mais sobre este assunto incrível em nosso blog.
Ler Artigo
Brilho do Trifle de Frutas Vermelhas: Camadas de Pura Alegria de Verão
Leia mais sobre este assunto incrível em nosso blog.
Ler Artigo
Segredo das Asas Crocantes: Seu Jogo Nunca Mais Será o Mesmo
Leia mais sobre este assunto incrível em nosso blog.
Ler Artigo
Crocância Cítrica: Crumble de Limão e Frutas Vermelhas
Leia mais sobre este assunto incrível em nosso blog.
Ler Artigo
Transform a pantry classic into a festive dinner. Seared tuna and slow-braised beans: a surprisingly easy gourmet recipe to impress your guests.
Leia mais sobre este assunto incrível em nosso blog.
Ler Artigo
Philly Hoagie Recipe: Master Authentic Homemade Perfection
Leia mais sobre este assunto incrível em nosso blog.
Ler Artigo
Marque um golaço: Hot Dogs Icônicos da Copa em Sua Cozinha
Leia mais sobre este assunto incrível em nosso blog.
Ler Artigo
Best Pellet Smokers (2026): Easy Wood-Fired Cooking Guide
Leia mais sobre este assunto incrível em nosso blog.
Ler Artigo
{ "title": "Amazonian Pirarucu: A Celebratory Feast for the Senses", "subtitle": "Discover the exotic flavors of the Amazon with an elegant Pirarucu dish, perfect for special occasions.", "content": "<h2>Introduction: A Culinary Ode to the Amazon</h2>\n<p>Just as the 'Conversa com o Autor' program celebrates the profound literary heritage of the Amazon, inviting us into the world of poets like Thiago de Mello, so too can gastronomy transport us. This recipe is an invitation to explore the vibrant culinary soul of the region, echoing the spirit of discovery and appreciation for unique Amazonian treasures.</p>\n<p>Embark on a unique culinary journey with our Pirarucu, elegantly prepared with a crunchy Brazil nut crust and a velvety Brazil nut milk sauce. This dish offers an unparalleled blend of textures and authentic flavors, designed to captivate even the most discerning palates. It's a sophisticated tribute to the rich biodiversity of Brazil's northern regions.</p>\n<p>This exquisite recipe is ideal for those who cherish gourmet experiences and wish to impress guests with something truly special. Whether marking a significant anniversary, hosting a festive gathering, or simply celebrating life's moments, this Pirarucu dish promises an unforgettable dining experience that speaks of celebration and deep regional pride.</p>\n\n<h2>Why This Recipe Achieves Such Culinary Acclaim</h2>\n<p>This Pirarucu recipe stands out for its masterful balance of exotic flavors and delightful textures, making it a guaranteed success at any table. The Pirarucu, known as the 'cod of the Amazon,' offers a firm yet flaky texture, absorbing flavors beautifully. Its mild profile is perfectly complemented by the robust nuttiness of the Brazil nut crust, adding an irresistible crunch.</p>\n<p>O segredo desta receita é a harmonia entre a delicadeza do peixe e a riqueza da castanha-do-Pará, ambos protagonistas de um sabor inconfundível. The creamy Brazil nut milk sauce binds these elements, elevating the dish with its subtle sweetness and earthy undertones. This combination creates a truly memorable gastronomic experience that is both sophisticated and deeply comforting.</p>\n<p>Beyond its incredible taste, the dish offers a practical elegance that makes it highly appealing for home cooks aspiring to gourmet results. While seemingly complex, the steps are straightforward, allowing even intermediate chefs to achieve a restaurant-quality meal. It embodies both culinary adventure and accessible sophistication.</p>\n\n<h2>Ingredients Unveiled: The Soul of the Amazon</h2>\n<ul>\n <li><strong>600g Pirarucu fillet (fresh or thawed):</strong> This majestic Amazonian fish provides a firm, white, and flaky flesh with a mild flavor, perfect for absorbing other ingredients.</li>\n <li><strong>150g Brazil nuts:</strong> Crucial for the crust, offering a rich, buttery flavor and a satisfying crunch that contrasts beautifully with the fish.</li>\n <li><strong>200ml Brazil nut milk:</strong> Forms the base of our creamy sauce, imparting a unique, subtle sweetness and a silky texture.</li>\n <li><strong>1 onion (medium, chopped):</strong> Aromatic foundation for the sauce, providing depth and savory notes.</li>\n <li><strong>2 cloves garlic (minced):</strong> Essential for a pungent, fragrant base, enhancing overall flavor complexity.</li>\n <li><strong>50ml white wine (dry):</strong> Adds acidity and a layer of sophistication to the sauce, deglazing the pan effectively.</li>\n <li><strong>1 tbsp olive oil:</strong> For sautéing aromatics and searing the fish, ensuring even cooking and rich flavor.</li>\n <li><strong>2 tbsp butter:</strong> Used to finish the sauce, providing richness and a glossy sheen, rounding out the flavors beautifully.</li>\n <li><strong>Salt and black pepper to taste:</strong> Fundamental seasonings to enhance and balance all the natural flavors of the ingredients.</li>\n <li><strong>Fresh cilantro or parsley for garnish:</strong> Provides a fresh, herbaceous finish and a pop of color, elevating presentation.</li>\n</ul>\n\n<h2>Step-by-Step Culinary Journey</h2>\n<ol>\n <li><strong>Prepare the Pirarucu:</strong> Pat the Pirarucu fillets dry with paper towels. Season generously with salt and black pepper on both sides.</li>\n <li><strong>Create the Brazil Nut Crust:</strong> In a food processor, pulse the Brazil nuts until coarsely chopped. Transfer to a shallow plate. Press one side of each Pirarucu fillet firmly into the crushed nuts to create an even crust.</li>\n <li><strong>Sear the Fish:</strong> Heat olive oil in a large non-stick skillet over medium-high heat. Place the Pirarucu fillets, nut-crusted side down, in the hot pan. Sear for 3-4 minutes until the crust is golden and crispy.</li>\n <li><strong>Finish Cooking:</strong> Carefully flip the fillets. Reduce heat to medium-low, cover the skillet, and cook for another 5-7 minutes, or until the fish is cooked through and flakes easily with a fork. Remove fish from pan and set aside.</li>\n <li><strong>Begin the Sauce:</strong> In the same skillet, add a little more olive oil if needed. Sauté the chopped onion until translucent, about 3-4 minutes. Add minced garlic and cook for another minute until fragrant.</li>\n <li><strong>Deglaze and Simmer:</strong> Pour in the white wine, scraping up any browned bits from the bottom of the pan. Let it simmer for 1-2 minutes until slightly reduced.</li>\n <li><strong>Complete the Sauce:</strong> Stir in the Brazil nut milk. Bring to a gentle simmer, then reduce heat and let it thicken slightly, about 3-5 minutes. Stir in the butter until melted and emulsified. Season the sauce with salt and pepper to taste.</li>\n <li><strong>Serve:</strong> Plate the Pirarucu fillets, spooning the rich Brazil nut milk sauce generously over and around the fish. Garnish with fresh cilantro or parsley before serving immediately.</li>\n</ol>\n\n<h2>Chef's Expert Tips for Perfection</h2>\n<blockquote>dica culinária de especialista: For an exceptionally crispy crust, ensure your Brazil nuts are toasted lightly before crushing them. This enhances their flavor and texture significantly. Avoid overcrowding the pan when searing the fish to maintain high heat, ensuring a beautiful golden crust every time.</blockquote>\n<p>A dica mais importante é não subestimar a qualidade dos ingredientes. Fresh Pirarucu and high-quality Brazil nuts will make a noticeable difference in the final taste and texture of your dish. Seek out reputable sources for these Amazonian gems to truly elevate your culinary creation.</p>\n<p>The technique profissional é controlar a temperatura do forno ou fogão com precisão. Cozinhe o peixe até o ponto certo de maciez, evitando que resseque, o que preserva sua umidade natural e sabor delicado. A quick sear followed by a gentle finish is key.</p>\n\n<h2>Common Missteps to Avoid</h2>\n<ul>\n <li><strong>Overcooking the Pirarucu:</strong> The most common error is overcooking the fish, leading to dry, rubbery results. Pirarucu cooks relatively quickly; keep a close eye on it.</li>\n <li><strong>Skipping the Pat-Dry Step:</strong> Not properly drying the fish before seasoning prevents the crust from adhering well and can result in steaming instead of searing.</li>\n <li><strong>Unevenly Crushed Nuts:</strong> If the Brazil nuts are too fine, they won't provide enough crunch; if too coarse, they won't stick properly. Aim for a textured, coarse chop.</li>\n <li><strong>Rushing the Sauce:</strong> Allowing the sauce to simmer gently for a few minutes ensures the flavors meld and the consistency becomes perfectly smooth and velvety.</li>\n <li><strong>Neglecting Seasoning:</strong> Under-seasoning the fish or the sauce can leave the dish tasting bland. Taste and adjust seasoning at multiple stages of cooking for optimal flavor.</li>\n</ul>\n\n<h2>Creative Variations for Every Palate</h2>\n<p><strong>Versão Econômica:</strong> If Pirarucu is unavailable or too costly, substitute with a firm white fish like tilapia or cod. While the flavor profile will differ slightly, the Brazil nut crust and sauce will still create a delightful experience, maintaining the spirit of the dish.</p>\n<p><strong>Versão Saudável:</strong> Reduce the butter in the sauce and opt for grilling or baking the Pirarucu instead of searing. Serve with a side of steamed Amazonian greens or a fresh mango salad for a lighter, nutrient-rich meal.</p>\n<p><strong>Versão Gourmet:</strong> Elevate the sauce with a splash of truffle oil or a pinch of saffron for an added layer of luxury. Consider serving with roasted plantains or a vibrant cassava purée, complementing the rich flavors beautifully.</p>\n<p><strong>Versão Vegan:</strong> Replace Pirarucu with thick slices of grilled heart of palm or firm tofu. The Brazil nut crust and sauce can be easily adapted by ensuring all ingredients remain plant-based, offering a delicious and imaginative alternative.</p>\n\n<h2>Serving Suggestions and Storage</h2>\n<p>Serve this exquisite Pirarucu dish immediately to enjoy its optimal texture and warmth. It pairs beautifully with simple sides that don't overpower its delicate flavors. Consider a fresh green salad with a light vinaigrette, fluffy white rice, or a delicate purée of sweet potatoes or plantains.</p>\n<p>The Pirarucu is best consumed fresh. If you have leftovers, store them in an airtight container in the refrigerator for up to 2 days. Reheat gently in an oven or on a stovetop over low heat, adding a splash of water or broth to the sauce to prevent drying. Freezing is not recommended as it can alter the fish's texture and the sauce's consistency.</p>\n<p>Em termos simples: freshness is key for this dish. Enjoy it hot, savoring every Amazonian bite for the best possible experience. The integrity of the crust and the creaminess of the sauce are at their peak right after preparation.</p>\n", "metaTitle": "Amazonian Pirarucu Recipe: Brazil Nut Crust & Creamy Sauce", "metaDesc": "Explore the Amazonian culinary heritage with our Pirarucu recipe. Featuring a Brazil nut crust and rich sauce, it's perfect for special occasions. Get chef tips!", "aiSummary": "This article presents a gourmet Pirarucu recipe with a Brazil nut crust and creamy Brazil nut milk sauce, inspired by Amazonian heritage. It details ingredients, a step-by-step guide, chef tips for perfection, common errors, and variations, ensuring a sophisticated and unforgettable culinary experience suitable for special occasions. Emphasizing fresh ingredients and precise cooking, it offers a complete guide for preparing this acclaimed Amazonian dish.", "imageKeywords": "amazonian fish, pirarucu, brazil nut crust, gourmet fish recipe, brazilian cuisine, special occasion dish, culinary heritage, food photography, white fish, creamy sauce, amazon flavors" }
Leia mais sobre este assunto incrível em nosso blog.
Ler Artigo
Costco Summer Bakery Treats: Guide to Serving & Elevating
Leia mais sobre este assunto incrível em nosso blog.
Ler Artigo
Discover the ultimate brown sugar chocolate chip cookies! This easy recipe yields perfectly chewy edges, soft, gooey centers, and no white sugar for bakery-style bliss.
Leia mais sobre este assunto incrível em nosso blog.
Ler Artigo
Discover how to make vibrant, healthy chia pudding parfaits perfect for Instagram. A simple, delicious, and visually stunning breakfast recipe.
Leia mais sobre este assunto incrível em nosso blog.
Ler Artigo
Master vibrant mini fruit tarts! This guide offers pro tips, variations, and a step-by-step recipe for the perfect summer dessert. Rank #1!
Leia mais sobre este assunto incrível em nosso blog.
Ler Artigo
Redemoinho Aveludado: Criando Sorvete de Morango Irresistível em Casa
Leia mais sobre este assunto incrível em nosso blog.
Ler Artigo
Master the authentic Salad-e Shirazi with our expert guide. Fresh cucumbers, tomatoes, herbs, and zesty lime create a perfect, healthy summer side dish in minutes. Get tips and variations!
Leia mais sobre este assunto incrível em nosso blog.
Ler Artigo
Unlock stylish kitchen cabinets! Learn the easy, single detail to transform dated glass fronts into elegant showcases. A chef's guide to modern kitchen aesthetics.
Leia mais sobre este assunto incrível em nosso blog.
Ler Artigo
O Segredo do Chili Quente do Centro-Oeste: Simplesmente Perfeito.
Leia mais sobre este assunto incrível em nosso blog.
Ler Artigo
Slow Fermentation Artisan Bread: Chef's Taste at Home
Leia mais sobre este assunto incrível em nosso blog.
Ler Artigo
Thai Grilled Pork Skewers: Recipe & Mango Salad Guide. Discover this ultimate Thai BBQ favorite with chef tips.
Leia mais sobre este assunto incrível em nosso blog.
Ler Artigo
Master classic French Onion Soup with our expert guide. Learn secrets for perfectly caramelized onions, rich broth, and an irresistible cheesy gratin crust. Achieve Parisian perfection at home.
Leia mais sobre este assunto incrível em nosso blog.
Ler Artigo
Torrada Francesa de Brioche Dourado: Sua Indulgência Suprema no Brunch
Leia mais sobre este assunto incrível em nosso blog.
Ler Artigo
Domine o Cheung Fun de Camarão: Perfeição Dim Sum em Casa
Leia mais sobre este assunto incrível em nosso blog.
Ler Artigo
Scones Dourados de Amêndoa: Crocância e Maciez Irresistíveis
Leia mais sobre este assunto incrível em nosso blog.
Ler Artigo

Empanadas Patagônicas: Recheio Suculento e Massa Crocante
Leia mais sobre este assunto incrível em nosso blog.
Ler Artigo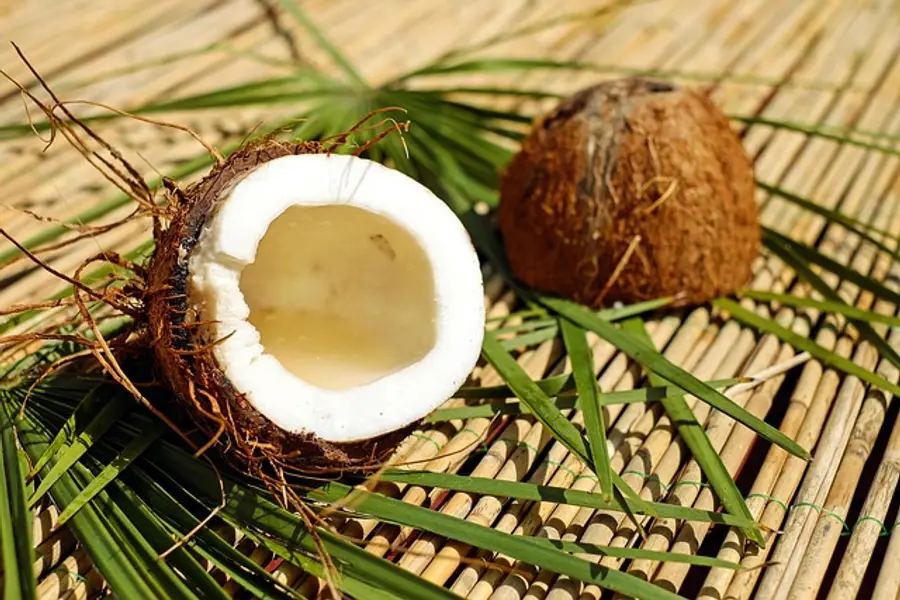
Caril de Peixe Picante e Coco: Leve o Calor do Sul para Casa
Leia mais sobre este assunto incrível em nosso blog.
Ler Artigo
Timeless Cheesecake: Classic Recipe, Chef Tips
Leia mais sobre este assunto incrível em nosso blog.
Ler Artigo
O Martini Perfeito: Gélido, Sedoso e Inesquecível a Cada Gole
Leia mais sobre este assunto incrível em nosso blog.
Ler Artigo
Discover the secret to transforming ordinary strawberries into an extraordinary dessert. This guide reveals deep sweetness, velvety textures, and pro chef tips.
Leia mais sobre este assunto incrível em nosso blog.
Ler Artigo
Seared Walleye: Perfect Golden Crust, Silky Puree, Sage Butter
Leia mais sobre este assunto incrível em nosso blog.
Ler Artigo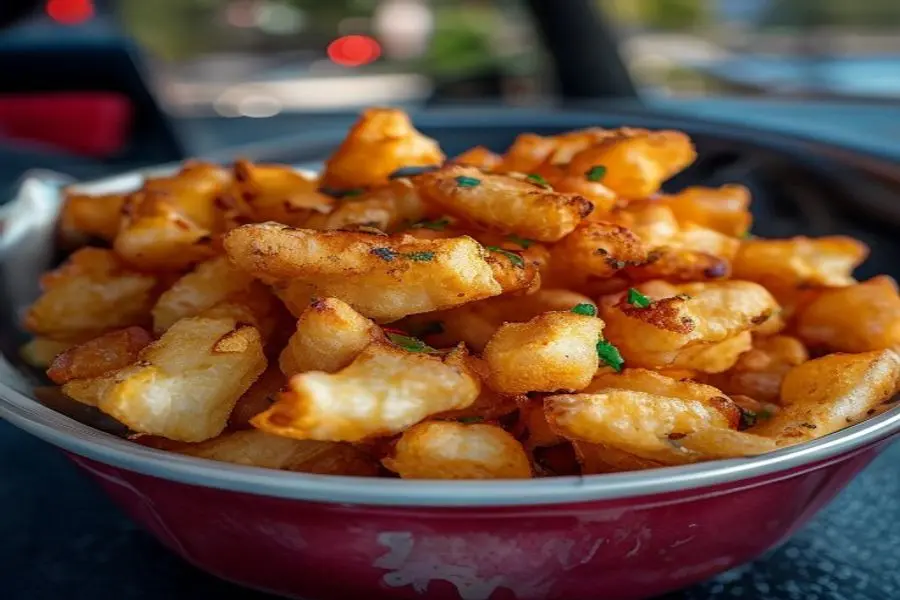
Reinvente o Sabor: Tater Tots Crocantes Estilo Drive-In
Leia mais sobre este assunto incrível em nosso blog.
Ler Artigo
Senegalese Fish & Lentils: Komolafe's Rof One-Pot Recipe
Leia mais sobre este assunto incrível em nosso blog.
Ler Artigo
Bon Appétit's Cutest Flaky Galette: Summer Pastry Recipe
Leia mais sobre este assunto incrível em nosso blog.
Ler Artigo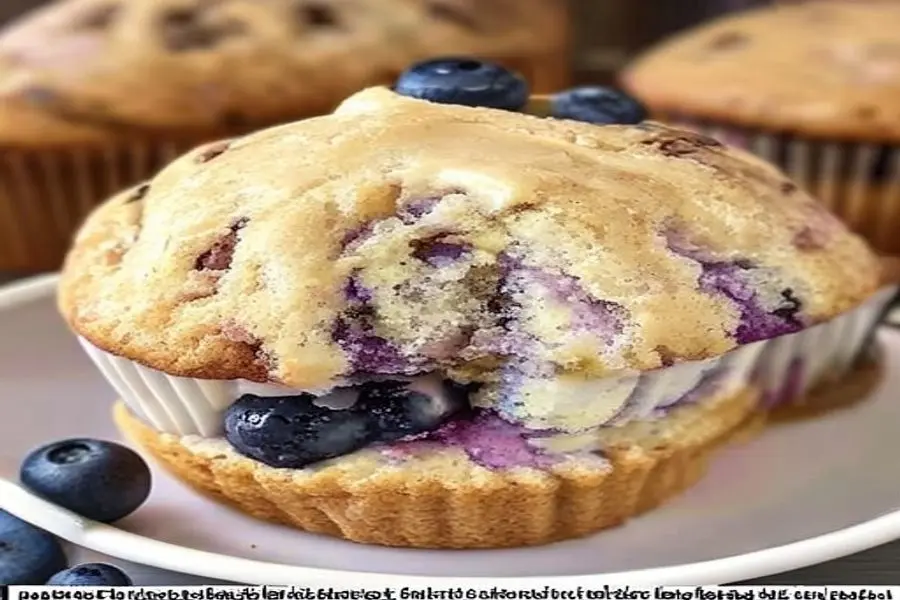
Unlock the recipe for incredibly moist blueberry muffins, featuring a rich cream cheese filling and the magic of condensed milk. Fluffy, tender, and simply irresistible.
Leia mais sobre este assunto incrível em nosso blog.
Ler Artigo
Master the iconic Papas Arrugadas recipe! Learn to make perfectly salt-crusted, tender wrinkly potatoes, a beloved snack from the Canary Islands. Discover expert tips & variations.
Leia mais sobre este assunto incrível em nosso blog.
Ler Artigo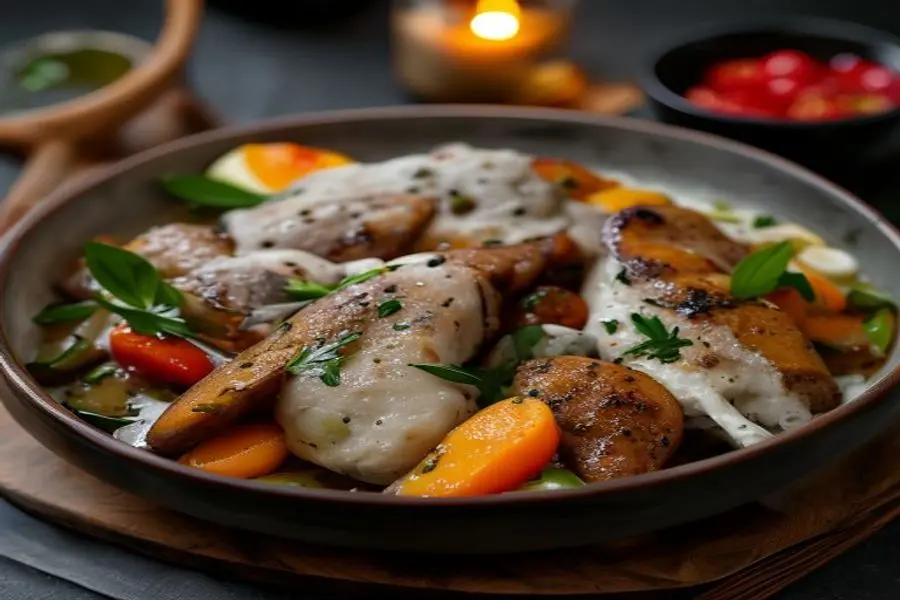
Effortless Weeknight Wonders: Your Guide to Quick, Flavorful Meals
Leia mais sobre este assunto incrível em nosso blog.
Ler Artigo
A Pasta de Limão Cremosa Que Supera Qualquer Viagem
Leia mais sobre este assunto incrível em nosso blog.
Ler Artigo
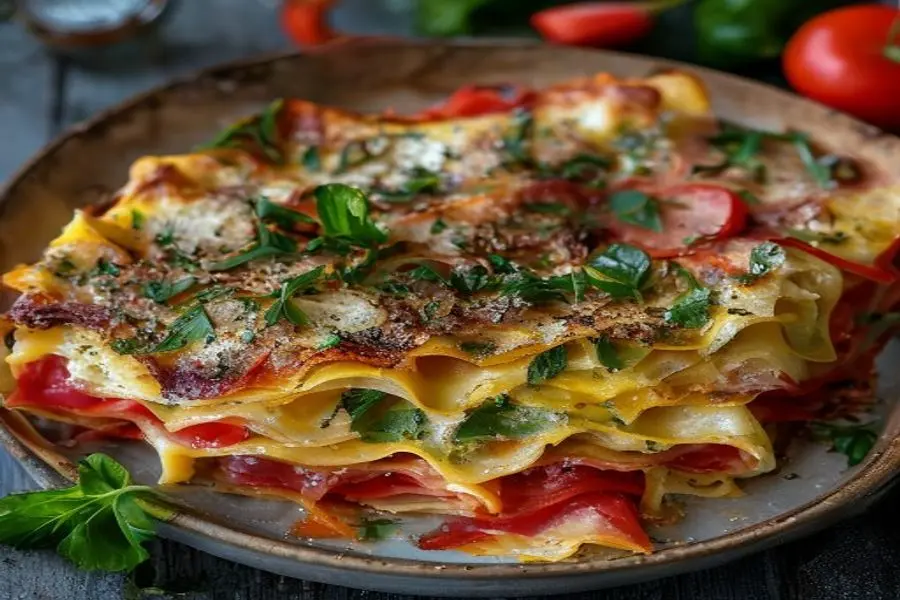
<h2>Beyond Bland: Reinventing Vegetable Lasagne with Seasonal Zest</h2> <p>For many, the mention of "vegetable lasagne" conjures images of watery sauces and uninspired, limp vegetables. This unfortunate reputation stems from past attempts to vegetarianize comfort food classics without true culinary innovation. However, a new era of plant-forward cooking is here, demonstrating how this beloved baked pasta can be a seasonal masterpiece, bursting with flavor and delightful textures.</p> <p>This reinvented vegetable lasagne banishes those soggy memories forever, celebrating vibrant seasonal produce at its peak. It's the perfect dish for a comforting family dinner, an elegant gathering with friends, or a delightful centerpiece for a weekend meal prep. Ideal for anyone seeking a truly satisfying and wholesome meat-free option that doesn't compromise on taste.</p> <p>Embrace a lasagne that truly lets great ingredients shine, proving that creative meat-free cooking has come a long way. Prepare to elevate your expectations and discover a dish that will earn its place as a cherished favorite in your culinary repertoire. This recipe guarantees layers of rich flavor and a beautifully balanced, satisfying experience.</p> <h3>Why This Recipe Is So Successful?</h3> <p>This vegetable lasagne achieves success by prioritizing fresh, seasonal ingredients and smart cooking techniques. It avoids the pitfalls of blandness and sogginess through roasting vegetables and building layers of robust flavor. Each component, from the rich tomato sauce to the creamy béchamel, is carefully crafted to create a harmonious and deeply satisfying dish.</p> <p>The popularity of this lasagne stems from its ability to offer genuine comfort without heaviness, appealing to both vegetarians and those simply seeking delicious alternatives. Its practicality allows for components to be prepared ahead, making assembly stress-free for busy cooks. The end result is a vibrant, flavorful dish that truly stands out.</p> <p>In simple terms: this recipe elevates the humble vegetable lasagne into an irresistible culinary experience. It combines traditional Italian comfort with modern, thoughtful preparation. Expect a dish that’s not just good for you, but genuinely exciting to eat, transforming any meal into a special occasion worth savoring and sharing.</p> <h3>Ingredients Explained</h3> <ul> <li><strong>Fresh Lasagne Sheets:</strong> Using fresh pasta ensures a tender bite and absorbs sauces beautifully without becoming tough. These sheets provide the essential structure for your magnificent layers.</li> <li><strong>Seasonal Vegetables (e.g., zucchini, eggplant, bell peppers, spinach):</strong> These are the stars, providing vibrant flavors, colors, and essential nutrients. Roasting them concentrates their sweetness and eliminates excess moisture, preventing a soggy lasagne.</li> <li><strong>Rich Tomato Passata:</strong> A high-quality passata forms the foundational layer of flavor, offering a smooth, intense tomato base. It binds the vegetables and cheese, creating a cohesive and aromatic sauce.</li> <li><strong>Aromatics (Onion, Garlic):</strong> These humble ingredients are crucial for building depth and complexity in both the tomato sauce and béchamel. They infuse the entire dish with a warm, inviting aroma.</li> <li><strong>Nutmeg:</strong> This spice is the secret ingredient for an authentic béchamel, lending a subtle warmth and sophistication. It perfectly complements the creamy texture, enhancing the overall richness.</li> <li><strong>Parmesan and Mozzarella Cheeses:</strong> Parmesan adds a salty, umami depth, while mozzarella provides that irresistible gooey, stretchy texture. Together, they create a golden, bubbling top crust that completes the dish.</li> <li><strong>Fresh Basil:</strong> A finishing touch that brightens the entire lasagne with its aromatic, peppery notes. It adds a layer of freshness that cuts through the richness of the cheese and sauce.</li> <li><strong>Extra Virgin Olive Oil:</strong> Used for sautéing aromatics and drizzling over roasted vegetables, it imparts a fruity, peppery note and aids in achieving a beautiful golden finish. It's essential for flavor development.</li> </ul> <h3>Complete Step-by-Step</h3> <ol> <li><strong>Prepare and Roast Vegetables:</strong> Preheat your oven to 200°C (400°F). Slice zucchini and eggplant thinly, and chop bell peppers. Toss with olive oil, salt, and pepper. Spread in a single layer on baking sheets and roast for 15-20 minutes until tender and slightly caramelized. This crucial step removes excess moisture.</li> <li><strong>Make the Tomato Sauce:</strong> In a large saucepan, sauté chopped onion and garlic in olive oil until softened. Add the tomato passata, a pinch of sugar (to balance acidity), salt, pepper, and a handful of fresh basil leaves. Simmer gently for at least 20-30 minutes, allowing flavors to meld and the sauce to thicken slightly.</li> <li><strong>Prepare the Béchamel Sauce:</strong> Melt butter in a saucepan over medium heat. Whisk in flour to create a roux, cooking for 1-2 minutes until golden. Gradually whisk in warm milk until smooth and thick. Season with salt, white pepper, and a generous grating of fresh nutmeg. Cook for 5 minutes, ensuring a creamy consistency.</li> <li><strong>Assemble the Lasagne:</strong> Spread a thin layer of tomato sauce at the bottom of a large ovenproof dish. Arrange a single layer of lasagne sheets over the sauce. Follow with a layer of roasted vegetables, a generous dollop of béchamel, and a sprinkle of Parmesan and mozzarella. Repeat these layers until all ingredients are used, finishing with béchamel and a generous cheese topping.</li> <li><strong>Bake to Perfection:</strong> Cover the dish loosely with foil and bake for 25 minutes. Remove the foil and bake for an additional 15-20 minutes, or until the cheese is bubbling, golden brown, and the pasta is tender. Let the lasagne rest for 10-15 minutes before serving to allow the layers to set.</li> </ol> <h3>Chef's Tips</h3> <blockquote>Expert culinary tip: To achieve truly al dente pasta without sogginess, briefly blanch fresh lasagne sheets in boiling water for 30 seconds before assembling, then shock in ice water. This pre-cooks them slightly and prevents sticking.</blockquote> <p>The most important tip is to properly roast your vegetables until slightly dry and caramelized. This significantly enhances their flavor and prevents your lasagne from becoming watery. Don't skip this step; it's the foundation of a great veggie lasagne.</p> <p>The secret to this recipe is layering your sauces and fillings strategically. Ensure an even distribution of tomato, béchamel, vegetables, and cheese in each layer. This balance guarantees a harmonious bite every time, preventing any single flavor from overpowering the others.</p> <p>A professional technique is to use freshly grated nutmeg in your béchamel sauce. The aroma and flavor difference from pre-ground nutmeg are substantial. This small detail elevates the sauce from good to truly exceptional, providing authentic warmth and depth.</p> <h3>Common Mistakes</h3> <ul> <li><strong>Using Uncooked or Watery Vegetables:</strong> The most common mistake is not properly preparing vegetables. Excess moisture will leach out during baking, leading to a runny, unappetizing lasagne. Always roast or sauté them first.</li> <li><strong>Bland Seasoning:</strong> Forgetting to season each component adequately—vegetables, tomato sauce, and béchamel—results in a flat-tasting dish. Salt and pepper are your friends; taste and adjust as you go.</li> <li><strong>Insufficient Sauce:</strong> Not enough sauce means dry, hard pasta layers. Ensure each layer of pasta is generously coated with either tomato or béchamel sauce to allow it to cook thoroughly and remain tender.</li> <li><strong>Overcrowding the Baking Dish:</strong> Packing too many ingredients into a small dish can lead to uneven cooking and spillage. Use an appropriately sized dish, allowing for even heat distribution and expansion.</li> <li><strong>Not Resting Before Serving:</strong> Cutting into the lasagne immediately after baking causes the layers to collapse and makes it difficult to serve neatly. A 10-15 minute rest allows everything to set beautifully.</li> </ul> <h3>Variations of the Recipe</h3> <p>For a **healthier version**, consider incorporating whole wheat lasagne sheets and reducing the amount of cheese, opting for lighter ricotta or a plant-based alternative. You can also add more leafy greens like kale for extra nutrients.</p> <p>To create an **economical variation**, focus on readily available, inexpensive root vegetables such as carrots and potatoes, or use frozen spinach instead of fresh. Making your own tomato sauce from canned tomatoes can also be more budget-friendly than passata.</p> <p>A **vegan version** is easily achieved by swapping dairy products for plant-based alternatives: use vegan butter, oat or soy milk for the béchamel, and your favorite vegan mozzarella and Parmesan-style cheese. Nutritional yeast can enhance cheesy flavor.</p> <p>Elevate to a **gourmet version** by adding exotic mushrooms like shiitake or oyster, incorporating high-quality artisanal cheeses like taleggio or fontina into the layers, and finishing with a drizzle of truffle oil. A touch of white wine in the béchamel also adds complexity.</p> <h3>How to Serve and Store</h3> <p>Allow the lasagne to rest for 10-15 minutes after baking before slicing. This crucial step ensures the layers set, making for cleaner portions and preventing it from falling apart. Serve hot, garnished with fresh basil leaves for an aromatic finish, perhaps with a simple green salad.</p> <p>To conserve, cool any leftover lasagne completely before transferring to an airtight container. It can be stored in the refrigerator for up to 3-4 days. For longer preservation, individual portions can be frozen for up to 3 months. Thaw in the refrigerator overnight and reheat thoroughly.</p> <p>Reheat individual slices in the microwave until warmed through, or in a preheated oven at 160°C (325°F) for 20-30 minutes, covered with foil to prevent drying. Remove the foil for the last few minutes if you desire a crispy top. Always ensure it reaches an internal temperature of 74°C (165°F).</p> <h3>Recipe at a Glance</h3> <p>This delightful vegetable lasagne offers a satisfying culinary experience without the usual fuss. The total **prep time** is approximately 45 minutes, with an additional **cook time** of 40-45 minutes for baking. This recipe **yields** 6-8 generous servings, making it perfect for families or gatherings.</p> <p>Considered a **medium difficulty** recipe, it’s accessible for most home cooks but rewards attention to detail, especially in vegetable preparation and sauce consistency. Each serving contains approximately **450-550 approximate calories**, depending on your specific ingredients and portion sizes. Enjoy this seasonal classic!</p>
Leia mais sobre este assunto incrível em nosso blog.
Ler Artigo
Master the art of Shio Pan, the ultra-crispy Japanese salt bread. Our definitive guide reveals secrets to its fluffy interior and fried base, easier than croissants!
Leia mais sobre este assunto incrível em nosso blog.
Ler Artigo
Picles Fritos Perfeitos: Crocância Salgada para o Filme
Leia mais sobre este assunto incrível em nosso blog.
Ler Artigo
Sopes de Masa Dourada: Bordas Crocantes, Alma Aveludada
Leia mais sobre este assunto incrível em nosso blog.
Ler Artigo
Upgrade your desserts effortlessly! Learn to transform Dream Whip with a tart drink mix into an amazing pie filling or cake frosting. Quick, delicious, and surprisingly simple.
Leia mais sobre este assunto incrível em nosso blog.
Ler Artigo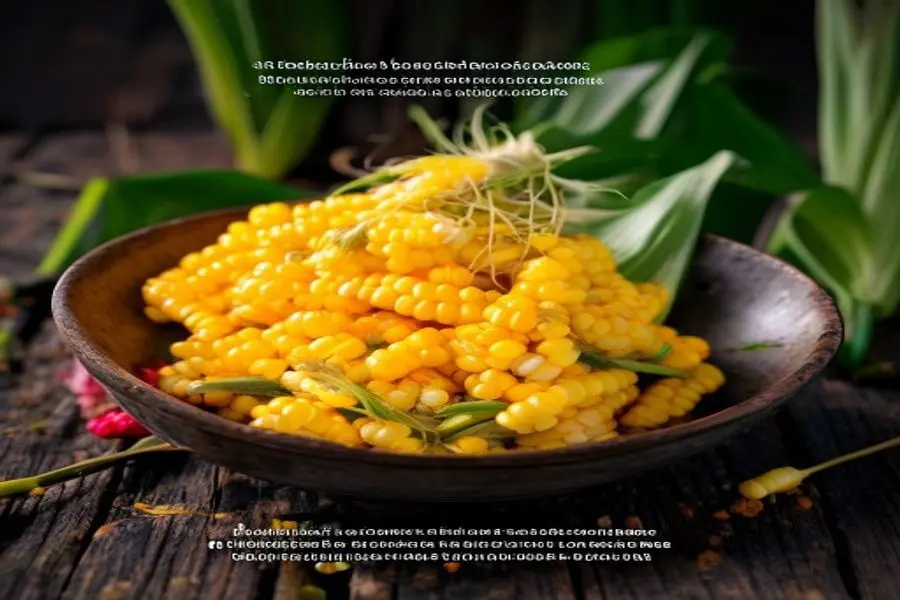
Redescubre el auténtico sabor del maíz con esta receta fácil. Aprende trucos de chef, evita errores comunes y cocina granos dorados perfectos siempre.
Leia mais sobre este assunto incrível em nosso blog.
Ler Artigo
Mitsu London EC2 Review: Fun, Flavor, & Modern Japanese Dining
Leia mais sobre este assunto incrível em nosso blog.
Ler Artigo
Frozen Watermelon Mojito Recipe | Ultimate Summer Drink
Leia mais sobre este assunto incrível em nosso blog.
Ler Artigo
Pãezinhos Caseiros: Superando o Sabor Secreto da Roadhouse
Leia mais sobre este assunto incrível em nosso blog.
Ler Artigo
Maciez Cítrica Irresistível: Bolo de Azeite, Limão e Mirtilo
Leia mais sobre este assunto incrível em nosso blog.
Ler Artigo
Homemade Neapolitan Pizza: Fluffy Crust, Rich Toppings
Leia mais sobre este assunto incrível em nosso blog.
Ler Artigo
Aprenda a fazer um Macchiato Caramelo perfeito em casa com dicas de barista. Receita detalhada, variações e segredos para um café incrível. Descubra!
Leia mais sobre este assunto incrível em nosso blog.
Ler Artigo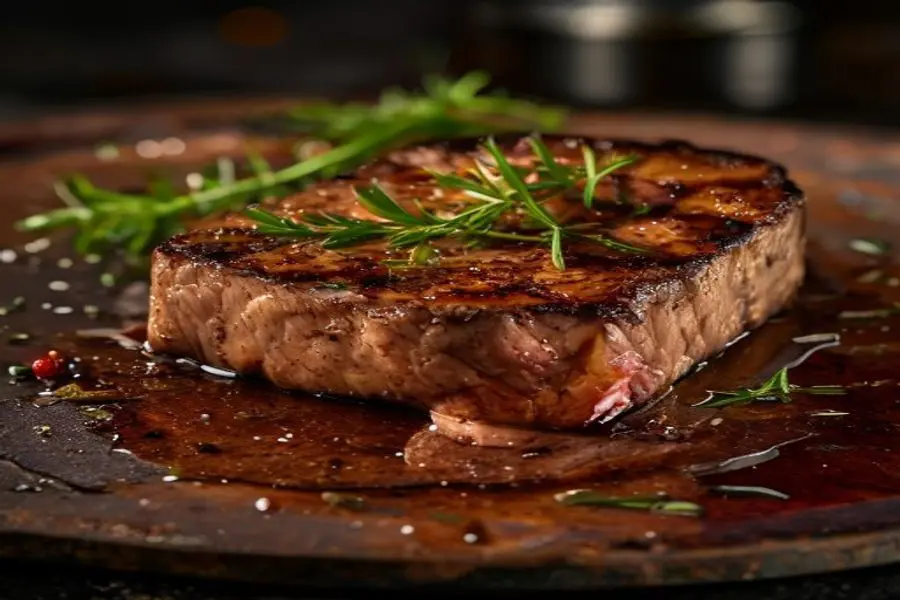
Ribeye Grelhado na Frigideira: Sabor de Steakhouse em Casa
Leia mais sobre este assunto incrível em nosso blog.
Ler Artigo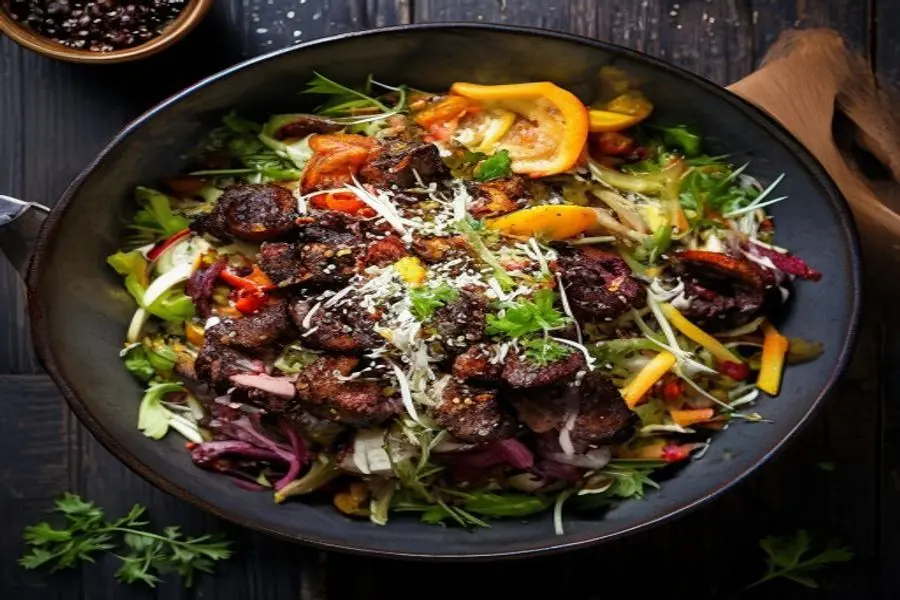
Coleslaw & BBQ: Perfect Pairing, Recipe & Chef Tips
Leia mais sobre este assunto incrível em nosso blog.
Ler Artigo
Summer Salads: Effortless, Fresh & Flavorful Recipes
Leia mais sobre este assunto incrível em nosso blog.
Ler Artigo
Blouge: Chilled Red Wine, Summer's Top Refreshment
Leia mais sobre este assunto incrível em nosso blog.
Ler Artigo
Craft a stunning Elderberry & Almond Frangipane Tart with this chef-designed recipe. Perfect for special occasions, discover tips, variations, and how to master this gourmet garden dessert.
Leia mais sobre este assunto incrível em nosso blog.
Ler Artigo
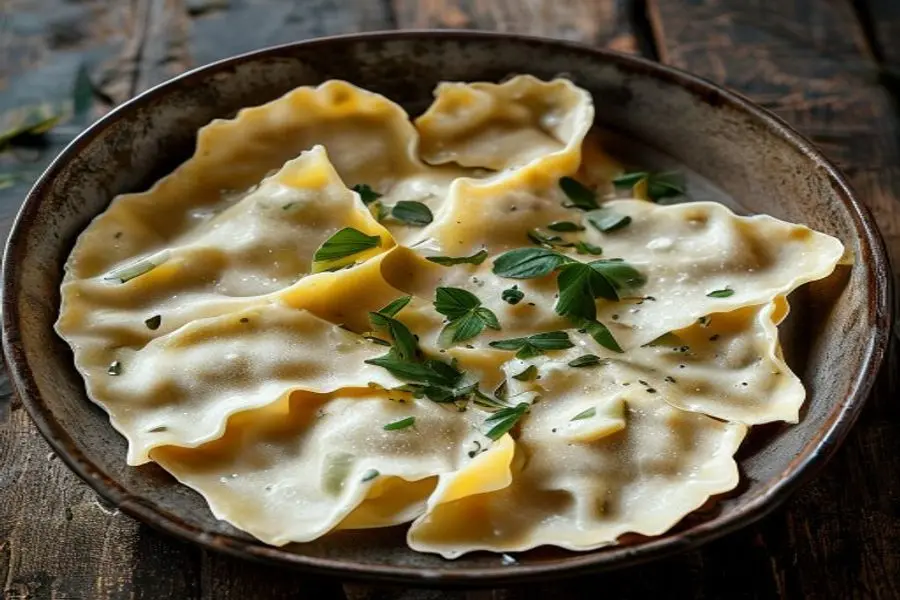
Agnolotti Piedmontês: Conforto e Homenagem ao Slow Food
Leia mais sobre este assunto incrível em nosso blog.
Ler Artigo
Crocante e Dourada Socca: A Irresistível Panqueca de Grão de Bico
Leia mais sobre este assunto incrível em nosso blog.
Ler Artigo
Buckeye Brownies: Fudgy, Creamy, Rich Indulgence
Leia mais sobre este assunto incrível em nosso blog.
Ler Artigo
Summer's Best Melons: 9 Types to Savor Now | Chef's Guide
Leia mais sobre este assunto incrível em nosso blog.
Ler Artigo

Pernil Assado Philly: Alma da Cidade, Toque de Chef em Casa
Leia mais sobre este assunto incrível em nosso blog.
Ler Artigo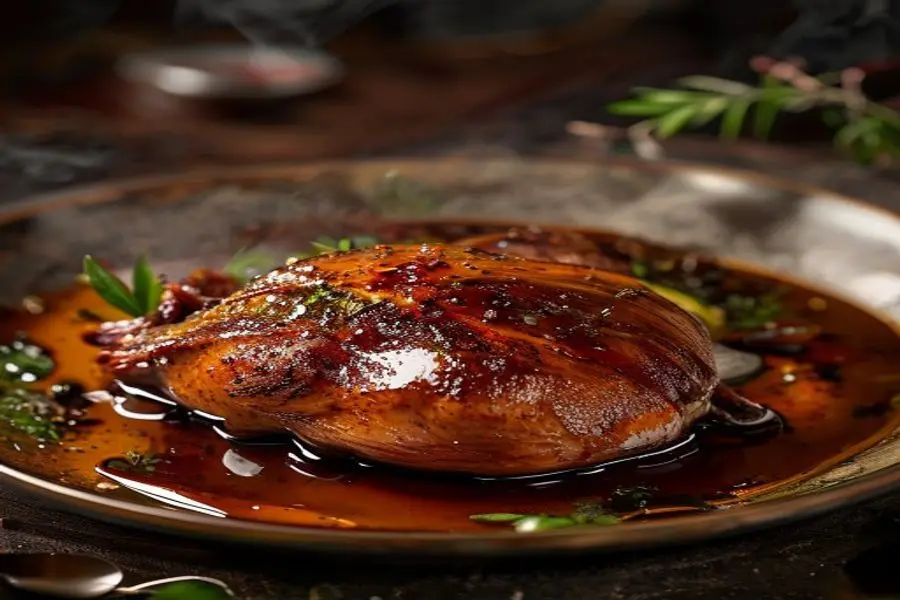
Elevate your home cooking with a luxurious smoked duck breast recipe, featuring a vibrant cherry-Sichuan glaze. Perfect for special occasions, master restaurant-quality flavors.
Leia mais sobre este assunto incrível em nosso blog.
Ler Artigo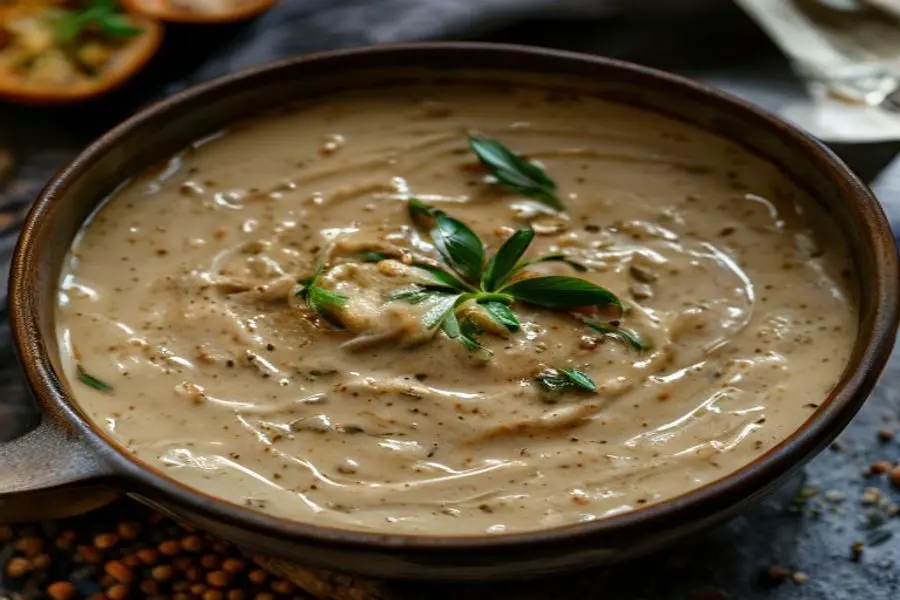
Molho Cremoso de Pimenta: Desvendando o Umami Inesquecível
Leia mais sobre este assunto incrível em nosso blog.
Ler Artigo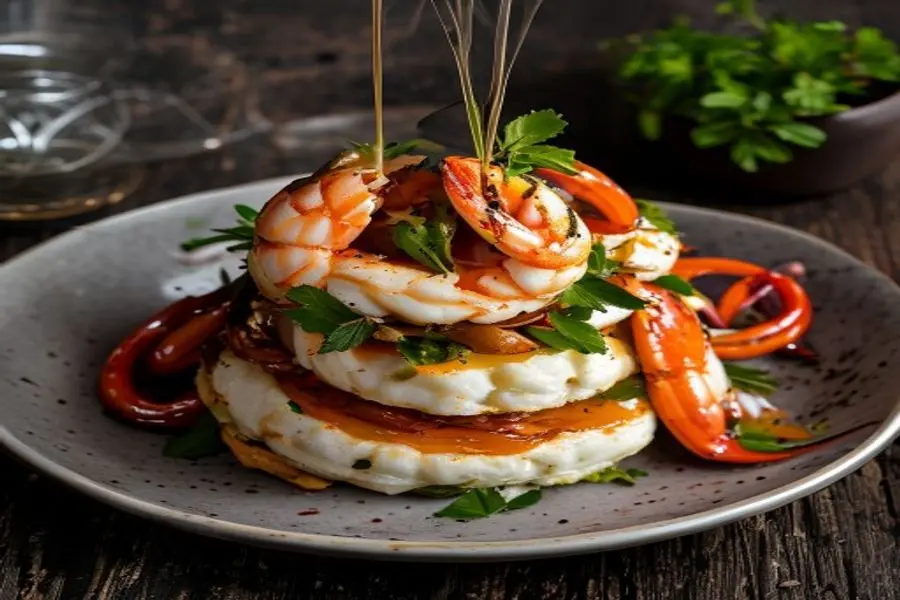
Descubra a harmonia de sabores: ruibarbo agridoce, camarão picante com harissa e a receita de sorvete caseiro mais cremosa. Uma experiência gastronômica inesquecível!
Leia mais sobre este assunto incrível em nosso blog.
Ler Artigo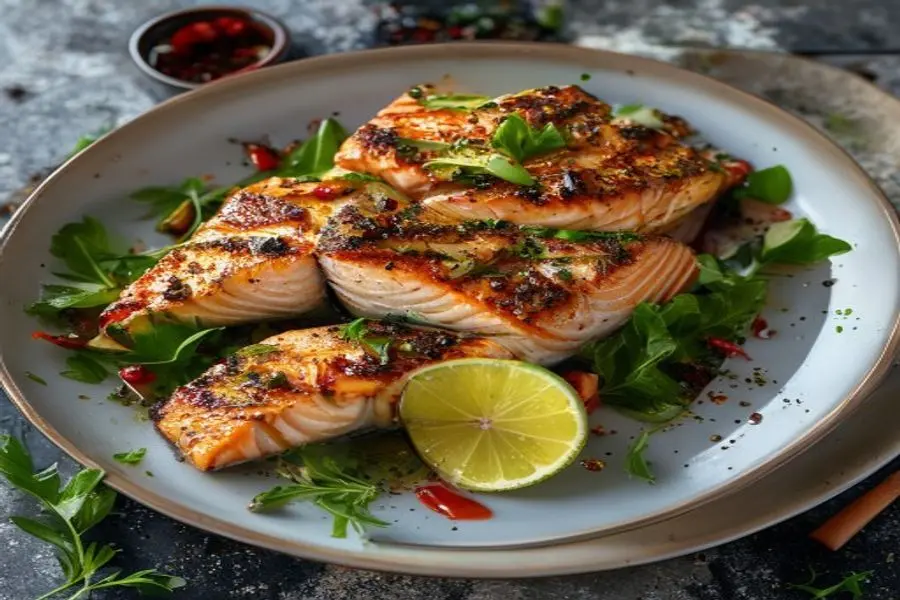
Salada de Salmão Grelhado: Limão, Pimentas e Ervas Vibrantes
Leia mais sobre este assunto incrível em nosso blog.
Ler Artigo
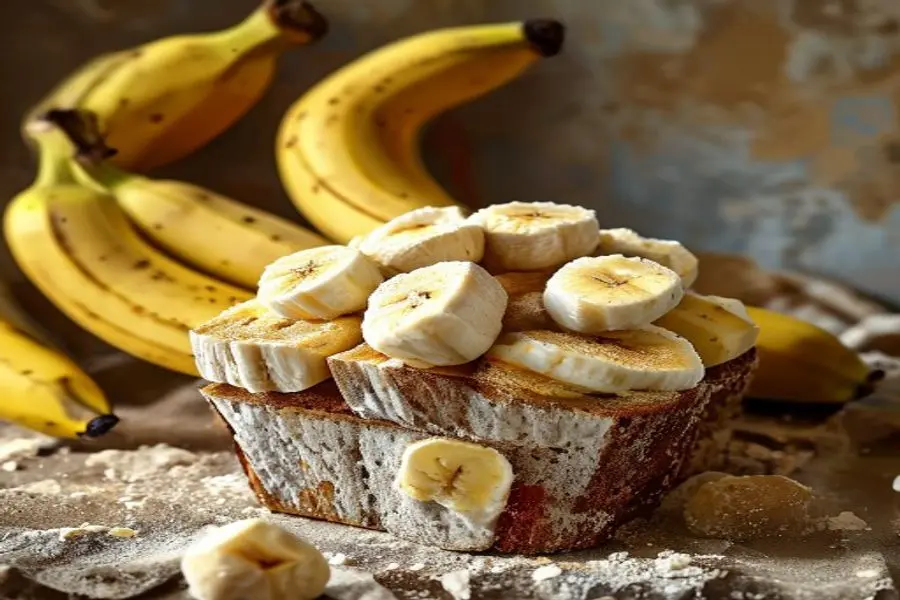
Doce Recompensa: Bananas Maduras Além do Pão
Leia mais sobre este assunto incrível em nosso blog.
Ler Artigo
Choose the Best Ice Cream Maker: Ultimate Home Guide
Leia mais sobre este assunto incrível em nosso blog.
Ler Artigo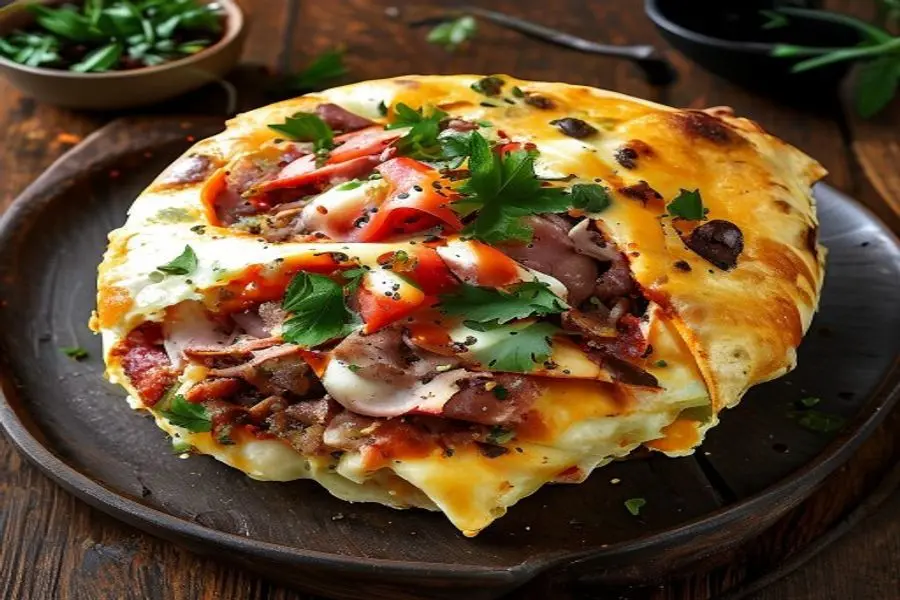
Mastering the Combo Calzone: Better Than Costco's Original
Leia mais sobre este assunto incrível em nosso blog.
Ler Artigo
Master the art of Bourride, a delightful Provençal fish stew. Simpler than bouillabaisse, this garlicky, rich recipe is ideal for any summer evening. Get the full chef's guide!
Leia mais sobre este assunto incrível em nosso blog.
Ler Artigo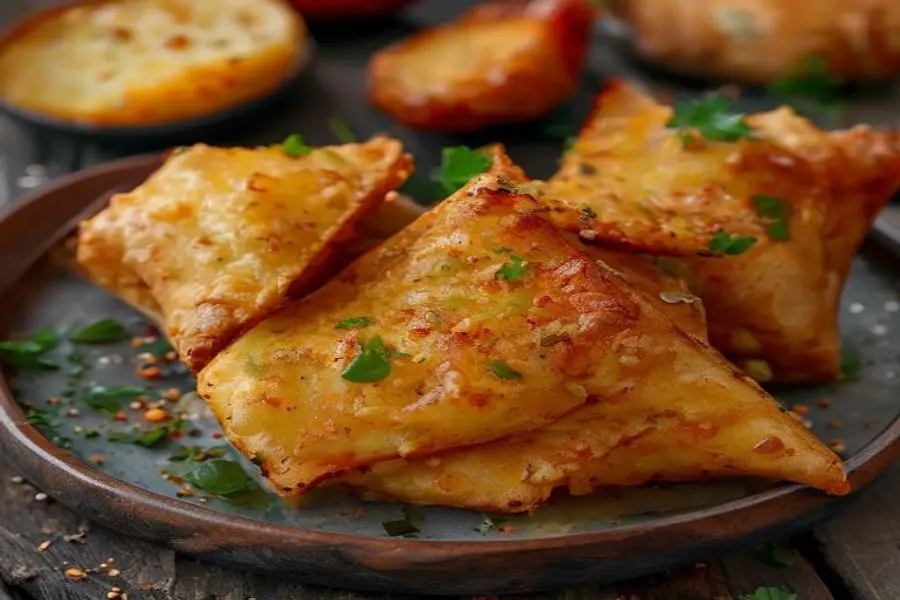
Turn leftover new potatoes into irresistible, crispy Indian spicy potato pockets! This chef-approved recipe is perfect for zero-waste cooking and vibrant flavors.
Leia mais sobre este assunto incrível em nosso blog.
Ler Artigo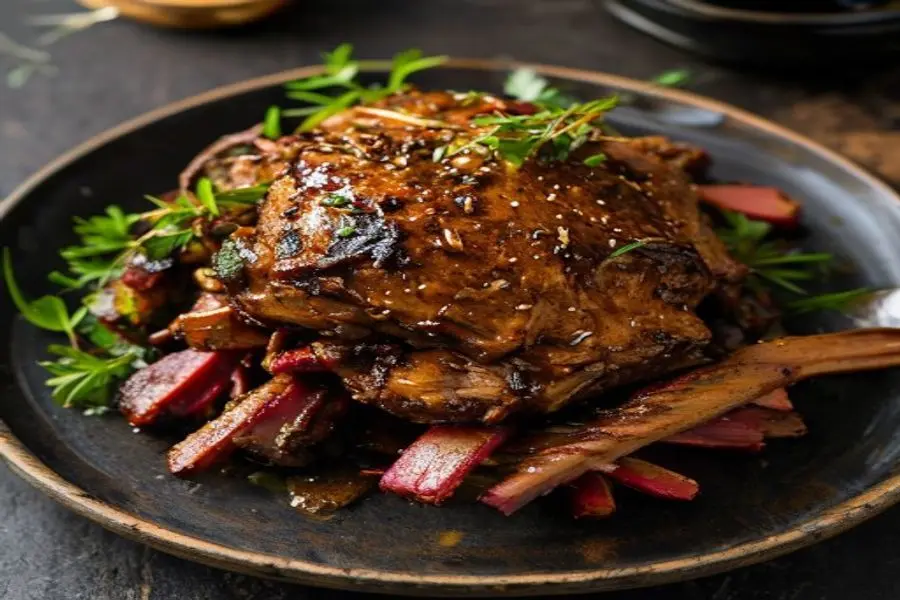
Slow Cooker BBQ Pulled Pork Recipe | Hands-Off Perfection
Leia mais sobre este assunto incrível em nosso blog.
Ler Artigo
O Último Gole: Criando Sua Obra-Prima Alcoólica Final
Leia mais sobre este assunto incrível em nosso blog.
Ler Artigo

Conheça Dean's, a nova sensação de pub britânico em NYC. Em seguida, domine a arte do fish and chips crocante e perfeito em casa com nossa receita de chef.
Leia mais sobre este assunto incrível em nosso blog.
Ler Artigo

Effortless elegance in one pan: flaky garlic butter halibut with vibrant spring vegetables for a gourmet meal ready in under an hour. Perfect for any weeknight.
Leia mais sobre este assunto incrível em nosso blog.
Ler Artigo
Unlock the secrets to a perfectly crispy, juicy roast chicken. This easy recipe promises flavor and convenience, ideal for any weeknight meal.
Leia mais sobre este assunto incrível em nosso blog.
Ler Artigo
Pare a Massa Grudada: Guia Diário para Orecchiette Perfeita
Leia mais sobre este assunto incrível em nosso blog.
Ler Artigo
Homemade Family Pizza: Ultimate Crust Recipe & Pro Tips
Leia mais sobre este assunto incrível em nosso blog.
Ler Artigo
Crocantes Douradas: As Melhores Batatas Assadas Inglesas Fofas
Leia mais sobre este assunto incrível em nosso blog.
Ler Artigo
Flawless Homemade Burgers: Pro Tips for Consistency & Speed
Leia mais sobre este assunto incrível em nosso blog.
Ler Artigo
Domine a arte de ovos recheados cremosos! Guia completo com dicas de chef, preparo e por que NUNCA congelar para textura impecável.
Leia mais sobre este assunto incrível em nosso blog.
Ler Artigo
Kimchi Branco: O Sabor Delicado Que Transforma Seu Paladar
Leia mais sobre este assunto incrível em nosso blog.
Ler Artigo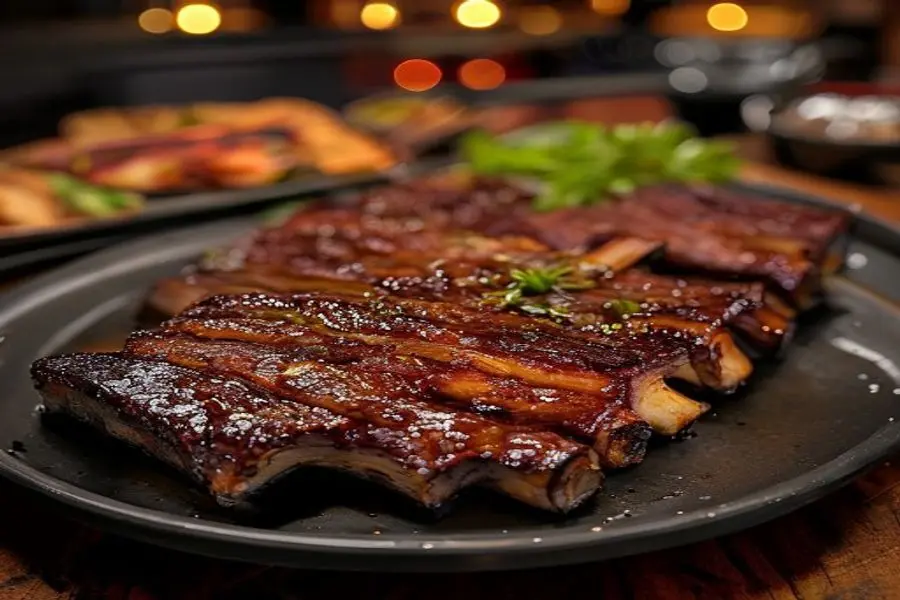
Costelinhas BBQ K.C.: Sabor Autêntico Melhor que Fora!
Leia mais sobre este assunto incrível em nosso blog.
Ler Artigo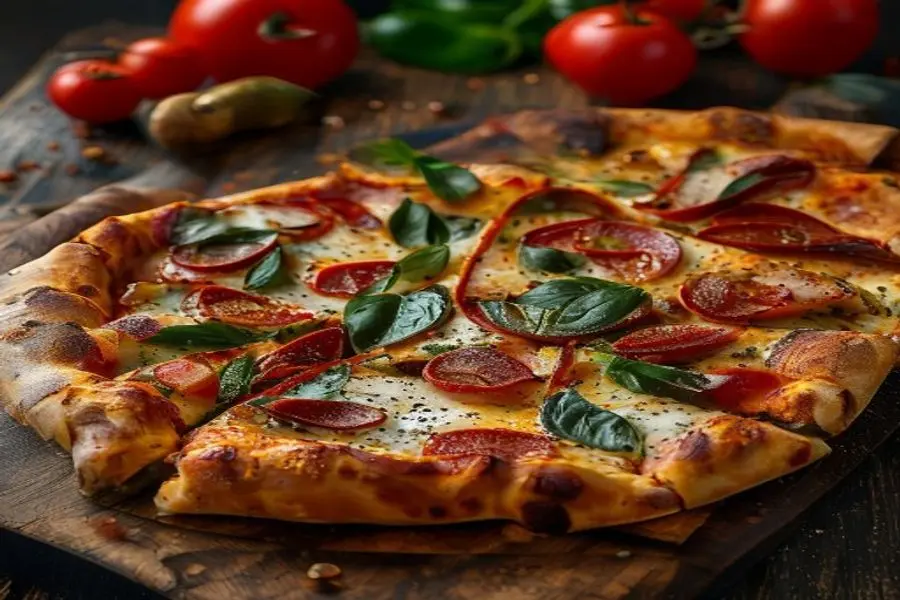
Elevate your Red Baron frozen pizza with our chef-approved guide. Discover baking secrets, gourmet variations, and common pitfalls for ultimate flavor. Perfect for quick meals!
Leia mais sobre este assunto incrível em nosso blog.
Ler Artigo
Perfeição para o Piquenique: Delícias Mastigáveis, Crocantes e à Prova de Sol
Leia mais sobre este assunto incrível em nosso blog.
Ler Artigo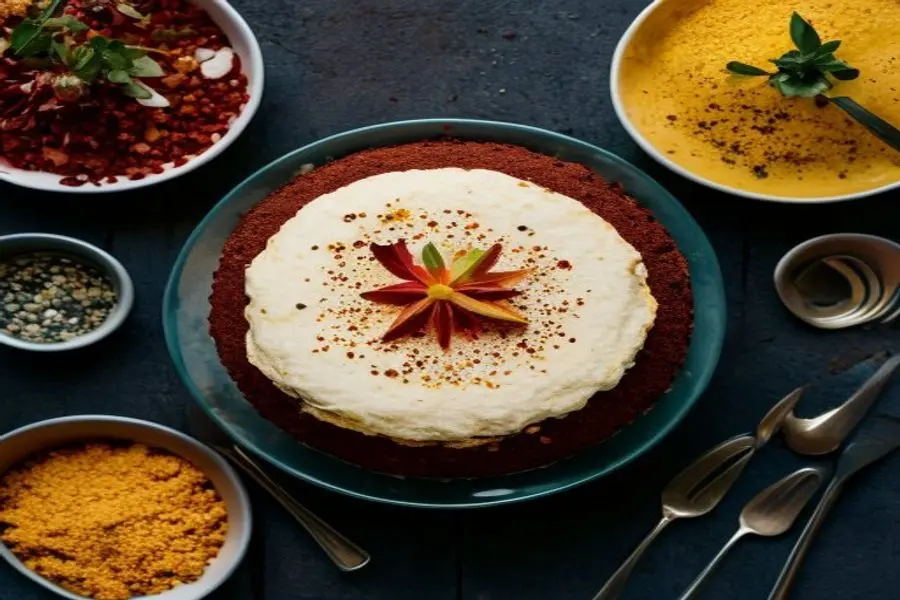
Discover the surprising ginger spice cake that launched Betty Crocker. Recreate this historic, non-basic recipe with our expert guide!
Leia mais sobre este assunto incrível em nosso blog.
Ler Artigo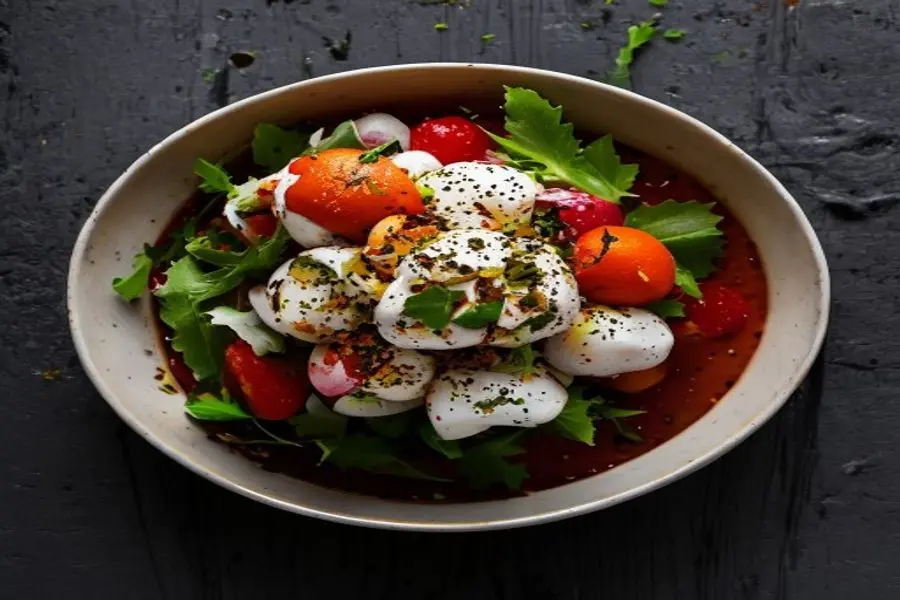
Explore the controversial Texas culinary trend of adding ranch dressing to tamales. Is it genius or gastronomical gaffe? Dive into the flavor debate!
Leia mais sobre este assunto incrível em nosso blog.
Ler Artigo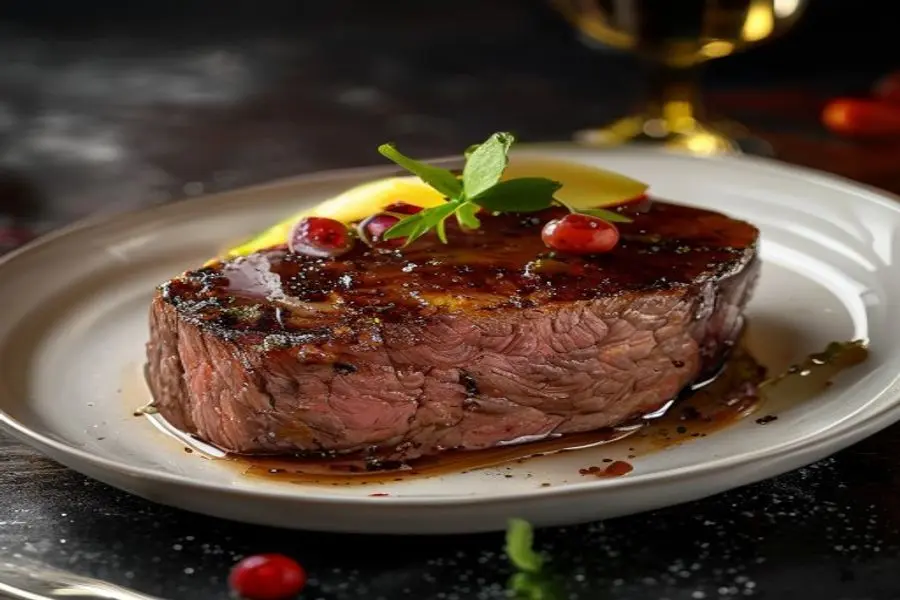
Jantar Impecável: Filé Mignon e os Melhores de Napa Valley
Leia mais sobre este assunto incrível em nosso blog.
Ler Artigo
White Beans: Your Secret for Easy, Nutritious Meals
Leia mais sobre este assunto incrível em nosso blog.
Ler Artigo
Master authentic Peruvian ceviche with our guide inspired by Chef Pía León. Discover expert tips, step-by-step instructions, and variations for this vibrant, zesty seafood dish.
Leia mais sobre este assunto incrível em nosso blog.
Ler Artigo
Explore why human connection, empathy, and skilled service remain paramount in the culinary world, outshining automated systems. A chef's perspective on the future of food.
Leia mais sobre este assunto incrível em nosso blog.
Ler Artigo
Azorean Wines: Discover Vibrant Freshness & Unique Terroir
Leia mais sobre este assunto incrível em nosso blog.
Ler Artigo

Descubra os melhores restaurantes de Kansas City além do churrasco. Explore bistrôs franceses, a vibrante Trilha do Taco e a culinária global. Seu guia definitivo para KC.
Leia mais sobre este assunto incrível em nosso blog.
Ler Artigo
Cherry Kalimotxo Recipe: Low-ABV Highball for Chic Evenings
Leia mais sobre este assunto incrível em nosso blog.
Ler Artigo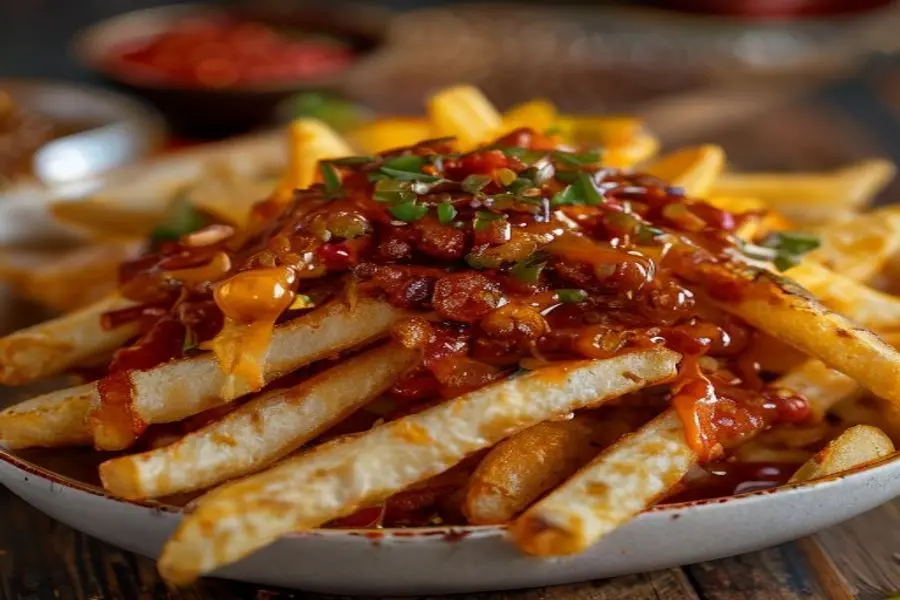
Master the art of making the best gourmet chili cheese fries at home. Perfect for game days, this recipe offers crispy fries, rich chili, and gooey cheese.
Leia mais sobre este assunto incrível em nosso blog.
Ler Artigo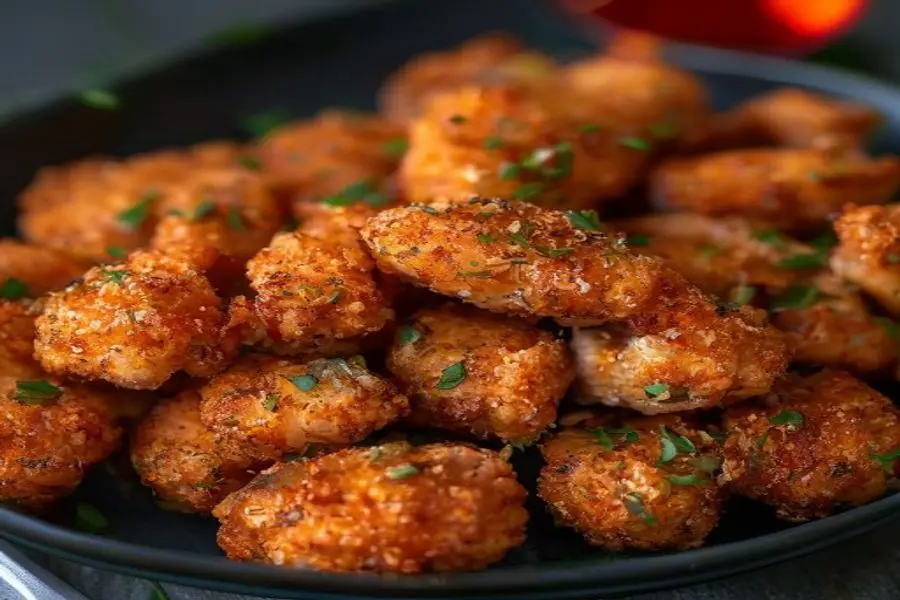
Frango Crocante Panko: Sabor Intenso em Minutos
Leia mais sobre este assunto incrível em nosso blog.
Ler Artigo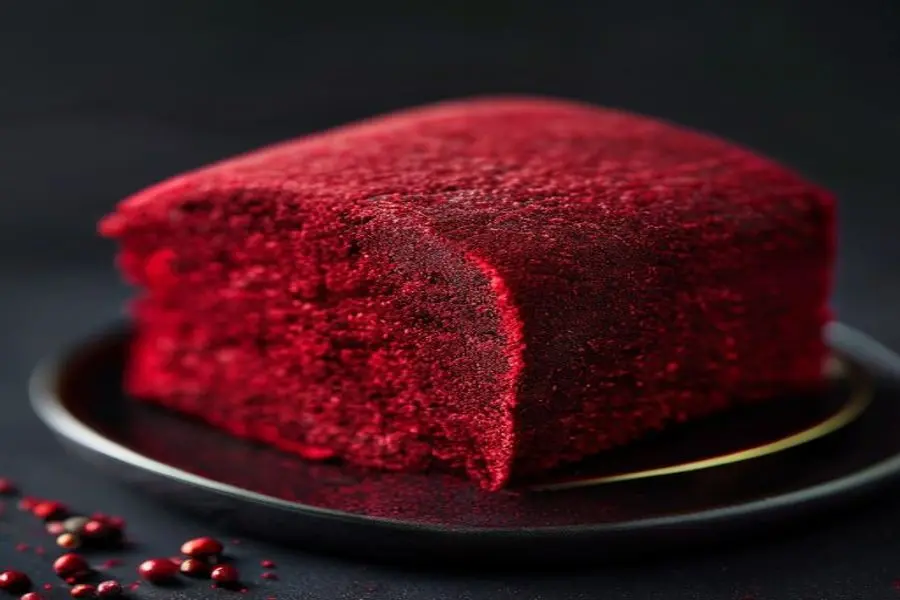
Transform your store-bought red velvet cake mix into a show-stopping dessert with these 4 easy, professional chef tweaks. Perfect for any occasion!
Leia mais sobre este assunto incrível em nosso blog.
Ler Artigo
Master creamy Primavera Risotto with our expert guide. Discover fresh ingredients, chef tips, and common mistakes for a perfect, vibrant spring meal every time. Optimized for home cooks.
Leia mais sobre este assunto incrível em nosso blog.
Ler Artigo
Transporte-se para a deslumbrante Costa Amalfitana com estas receitas cítricas e perfumadas. Descubra sabores vibrantes, dicas de chef e como evitar erros comuns para pratos italianos perfeitos.
Leia mais sobre este assunto incrível em nosso blog.
Ler Artigo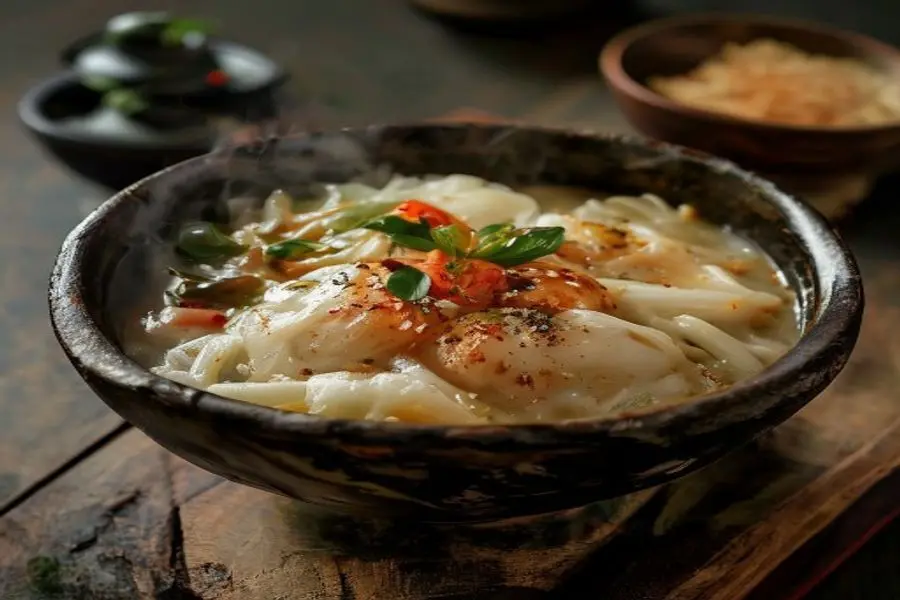
Samgyetang: Sabor Ancestral Coreano para Corpo e Alma
Leia mais sobre este assunto incrível em nosso blog.
Ler Artigo
Unlock the secret to restaurant-quality, velvety mac and cheese using affordable Aldi ingredients. Perfect for any craving!
Leia mais sobre este assunto incrível em nosso blog.
Ler Artigo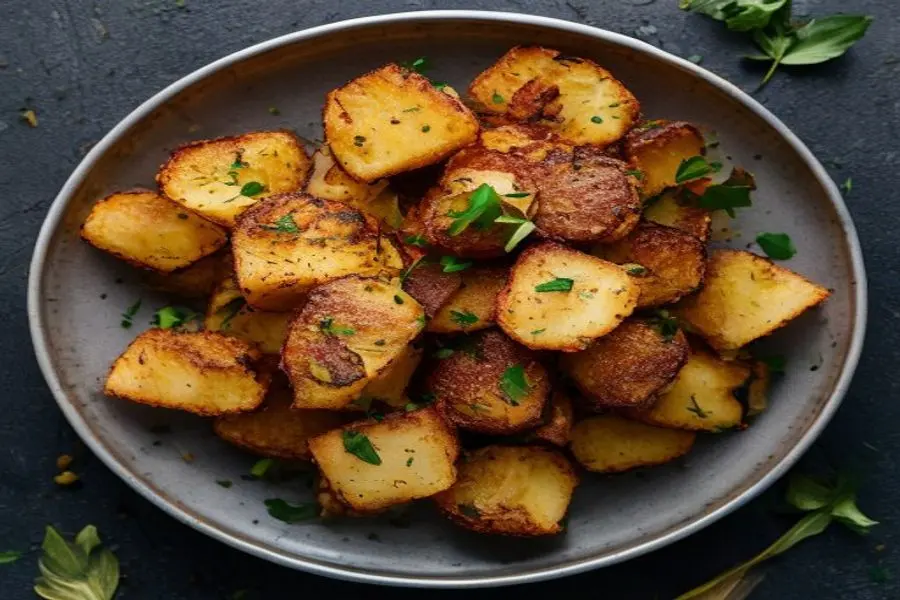
Mochi-Style Hash Browns: Crispy, Chewy, Unforgettable
Leia mais sobre este assunto incrível em nosso blog.
Ler Artigo
Corkage Fee Guide: Dine Smart, Sip Right - Folha Comida
Leia mais sobre este assunto incrível em nosso blog.
Ler Artigo
O Icônico Hambúrguer Grelhado: Seu Whopper, Reinventado
Leia mais sobre este assunto incrível em nosso blog.
Ler Artigo
No-Cook Summer Meals: Beat the Heat with Easy Recipes
Leia mais sobre este assunto incrível em nosso blog.
Ler Artigo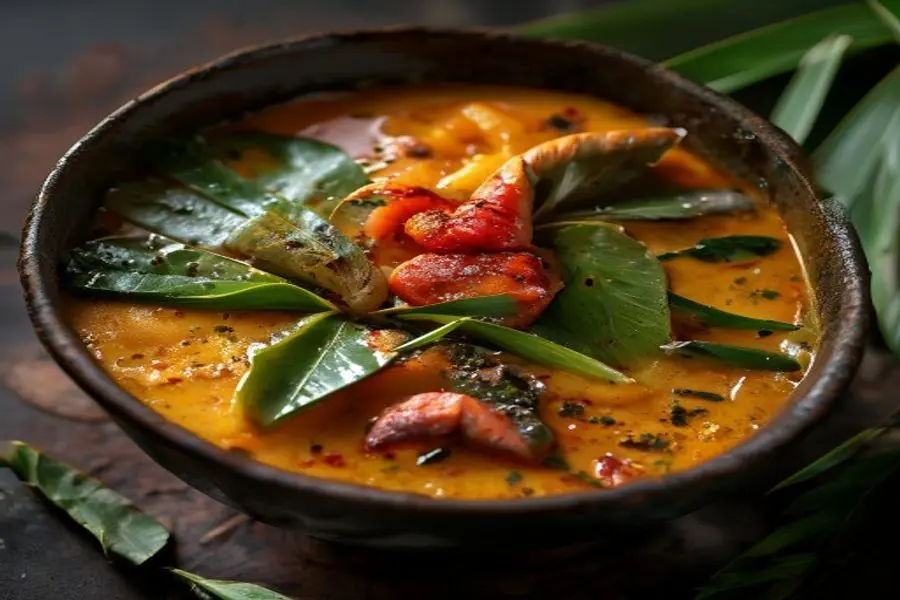
Discover our sophisticated Heart of Palm Moqueca recipe. A creamy, flavorful vegan stew, perfect for any occasion. Learn chef tips, variations, and how to master this Brazilian delight.
Leia mais sobre este assunto incrível em nosso blog.
Ler Artigo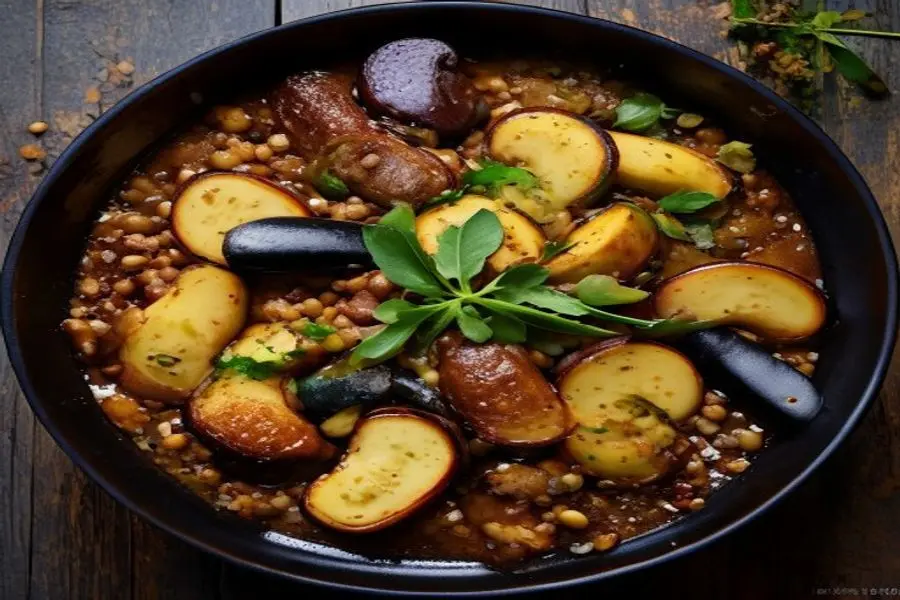
Discover the secret to perfectly tender, flavor-packed vegan braised aubergine. This recipe uses simple ingredients for a rich, umami-filled meal.
Leia mais sobre este assunto incrível em nosso blog.
Ler Artigo
Fofo, Frutado, Fantástico: Seu Próprio Sundae de Morango
Leia mais sobre este assunto incrível em nosso blog.
Ler Artigo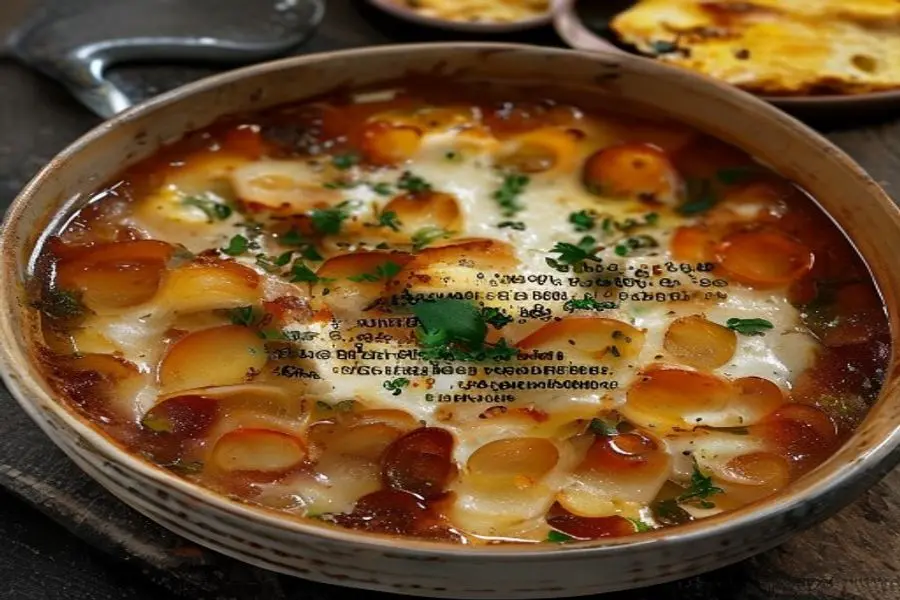
French Onion Soup Recipe: Ultimate Bistro Flavor at Home
Leia mais sobre este assunto incrível em nosso blog.
Ler Artigo
Massa Gratinada: O Melhor Sabor de Taco Em Cada Garfada
Leia mais sobre este assunto incrível em nosso blog.
Ler Artigo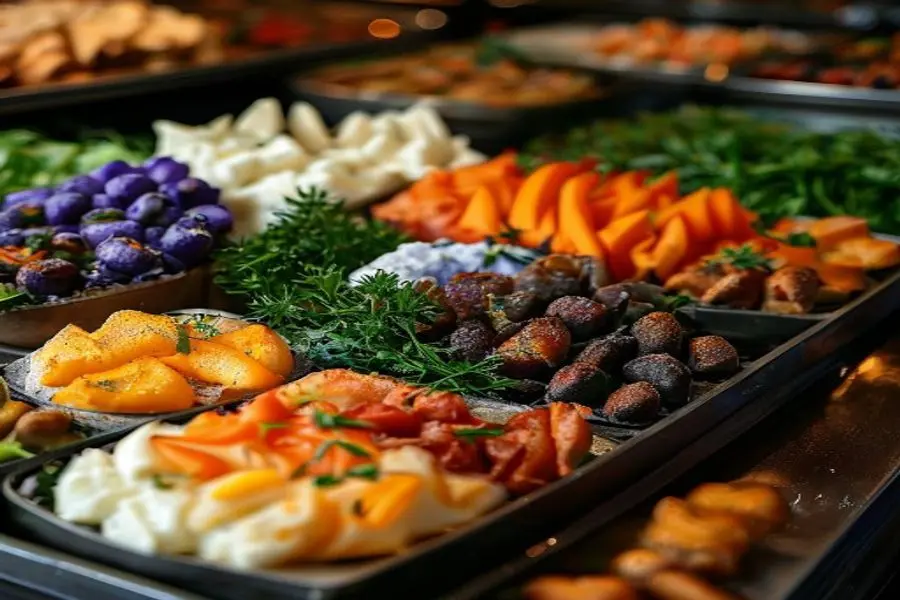
Transforme Sua Noite: Appetizers Congelados Costco Que Superam a Refeição Principal
Leia mais sobre este assunto incrível em nosso blog.
Ler Artigo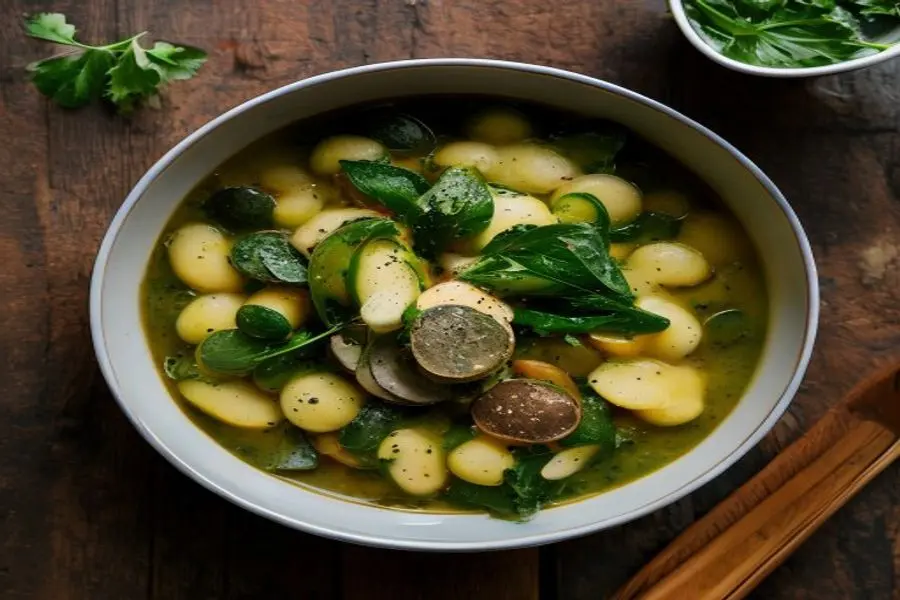
Caldo Verde: Traditional Comfort Soup Recipe Guide
Leia mais sobre este assunto incrível em nosso blog.
Ler Artigo
A Torta de Ameixa Atemporal: Seu Segredo para a Elegância sem Esforço
Leia mais sobre este assunto incrível em nosso blog.
Ler Artigo
Master Moqueca Capixaba, Espírito Santo's iconic fish stew. This recipe guides you through traditional flavors, fresh ingredients, and cultural heritage.
Leia mais sobre este assunto incrível em nosso blog.
Ler Artigo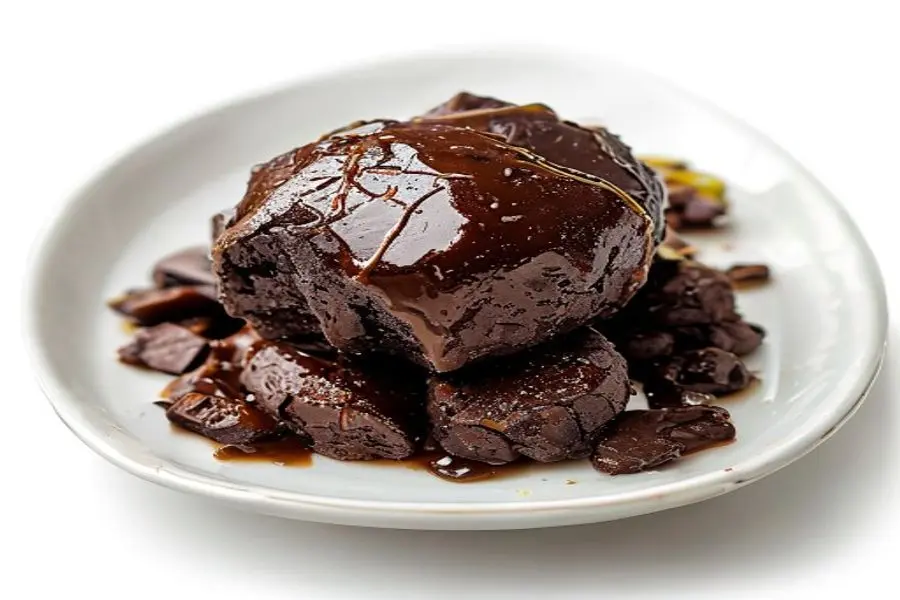
Master the art of Brazilian Coffee Brigadeiros. This easy recipe offers a rich, velvety indulgence, perfect for any occasion. Get pro tips & variations!
Leia mais sobre este assunto incrível em nosso blog.
Ler Artigo

Pommes Dauphine: Golden Crisp, Airy Perfection - Gourmet Recipe
Leia mais sobre este assunto incrível em nosso blog.
Ler Artigo
Golden Welsh Rarebit: O Supremo Prato de Conforto Britânico
Leia mais sobre este assunto incrível em nosso blog.
Ler Artigo
Master NYC's top crustacean trend with our irresistible Gochujang Honey Garlic Shrimp Skewers. Easy recipe, pro tips & kimchi aioli for gourmet taste.
Leia mais sobre este assunto incrível em nosso blog.
Ler Artigo
Desvende o Sabor: Hatch Chile Cheeseburger Caseiro Superior
Leia mais sobre este assunto incrível em nosso blog.
Ler Artigo
Destrave o Melhor da Melancia: Um Impulso Doce & Cítrico de 3 Ingredientes
Leia mais sobre este assunto incrível em nosso blog.
Ler Artigo
Barras de Cheesecake de Mirtilo e Crumble: O Sabor Supremo
Leia mais sobre este assunto incrível em nosso blog.
Ler Artigo
Discover the ultimate grilling trick for porterhouse steak that ensures both the strip and tenderloin sides are incredibly juicy and flavorful. A chef's guide for perfection.
Leia mais sobre este assunto incrível em nosso blog.
Ler Artigo
Cool Sips: Ultimate Poolside Cocktails for Summer Bliss
Leia mais sobre este assunto incrível em nosso blog.
Ler Artigo
Sonho Cremoso de Café: Textura Irresistível, Sabor Inesquecível
Leia mais sobre este assunto incrível em nosso blog.
Ler Artigo
Bolo Rolo Morango Nuvem: Leve, Luxuoso, Sabores Inesquecíveis
Leia mais sobre este assunto incrível em nosso blog.
Ler Artigo
Éclairs Crocantes por Fora, Cremosos por Dentro: Guia Definitivo
Leia mais sobre este assunto incrível em nosso blog.
Ler Artigo
Buc-ee's Jerky: Smart Buying for Ultimate Road Trip Taste
Leia mais sobre este assunto incrível em nosso blog.
Ler Artigo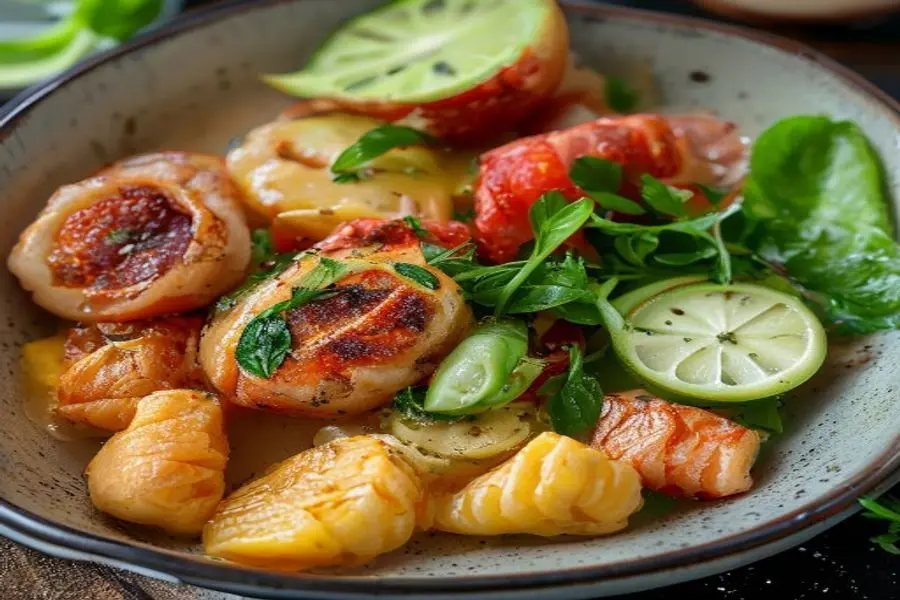
Fresco & Rápido: 25 Receitas de Verão para Noites Agitadas
Leia mais sobre este assunto incrível em nosso blog.
Ler Artigo
"Navigating Restaurant Tipping: Etiquette, Economics & Ethics"
Leia mais sobre este assunto incrível em nosso blog.
Ler Artigo
Crisp-Tender Vegetable Stir-Fry: Savory & Healthy Recipe
Leia mais sobre este assunto incrível em nosso blog.
Ler Artigo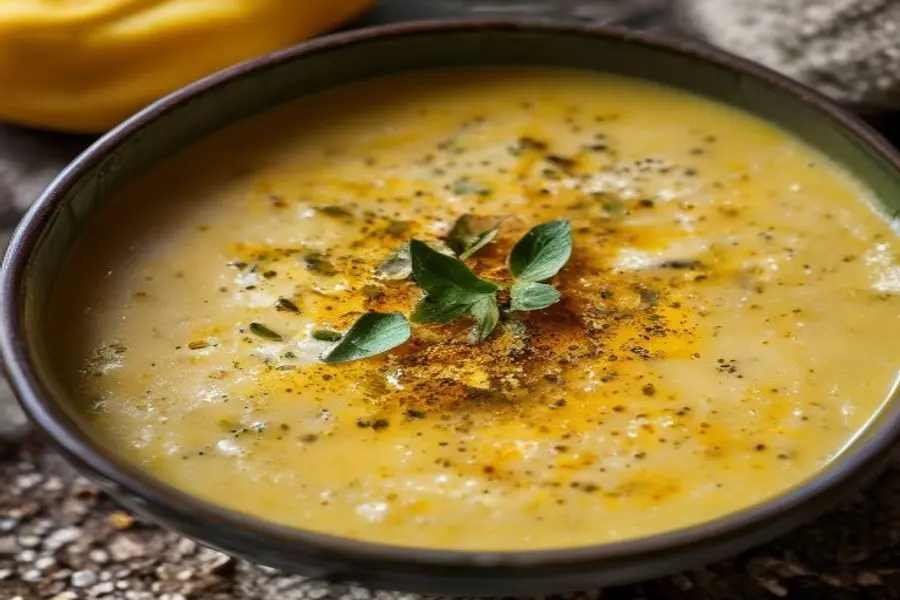
Sopa de Abóbora Amarela ao Curry: Cremosa e Aromática
Leia mais sobre este assunto incrível em nosso blog.
Ler Artigo
Mandoline Slicer: Perfect Cuts, Faster Prep, Safer Kitchen
Leia mais sobre este assunto incrível em nosso blog.
Ler Artigo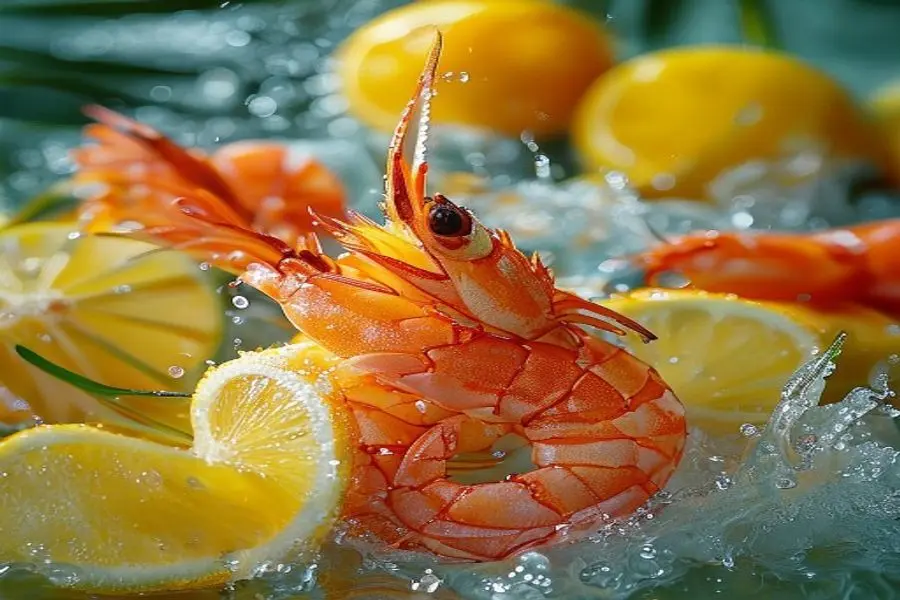
Discover the ultimate Palm Beach Citrus Shrimp Salad recipe. Fresh, vibrant, and easy to make, this dish brings tropical flavors to your table. Perfect for a light meal!
Leia mais sobre este assunto incrível em nosso blog.
Ler Artigo
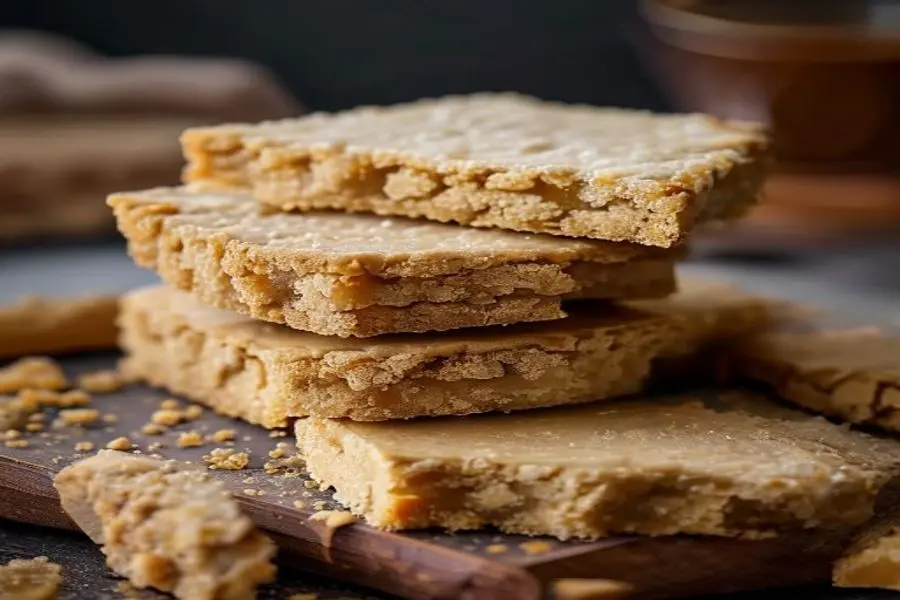
Shortbread Milionário Decadente: O Trio de Texturas Definitivo
Leia mais sobre este assunto incrível em nosso blog.
Ler Artigo
Quince Gourmet: Desvendando o Luxo Inteligente em Caviar e Vinho
Leia mais sobre este assunto incrível em nosso blog.
Ler Artigo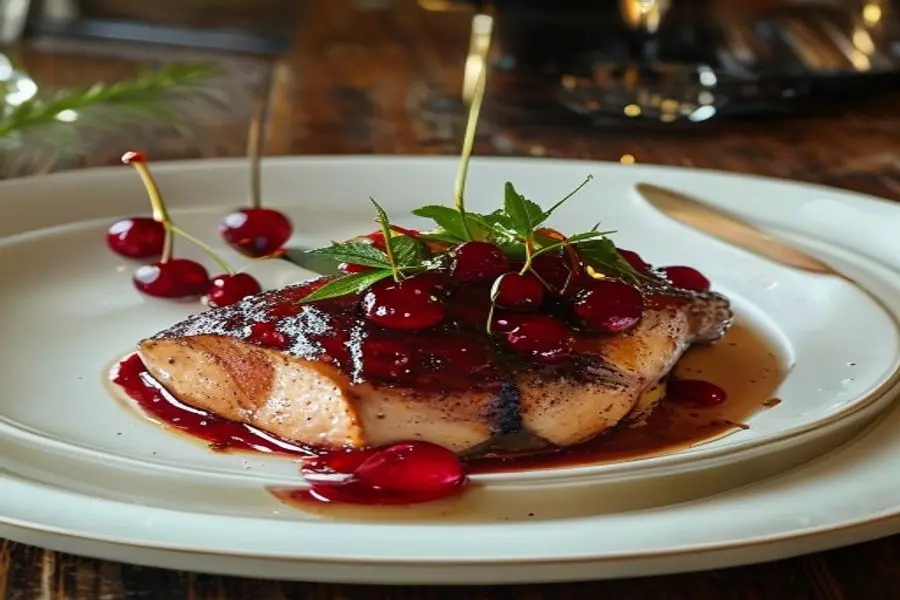
NYC Fine Dining em Casa: Pato Perfeito com Redução de Cereja
Leia mais sobre este assunto incrível em nosso blog.
Ler Artigo
Bife à Milanesa Perfeito: Crocante, Tenro e Delicioso
Leia mais sobre este assunto incrível em nosso blog.
Ler Artigo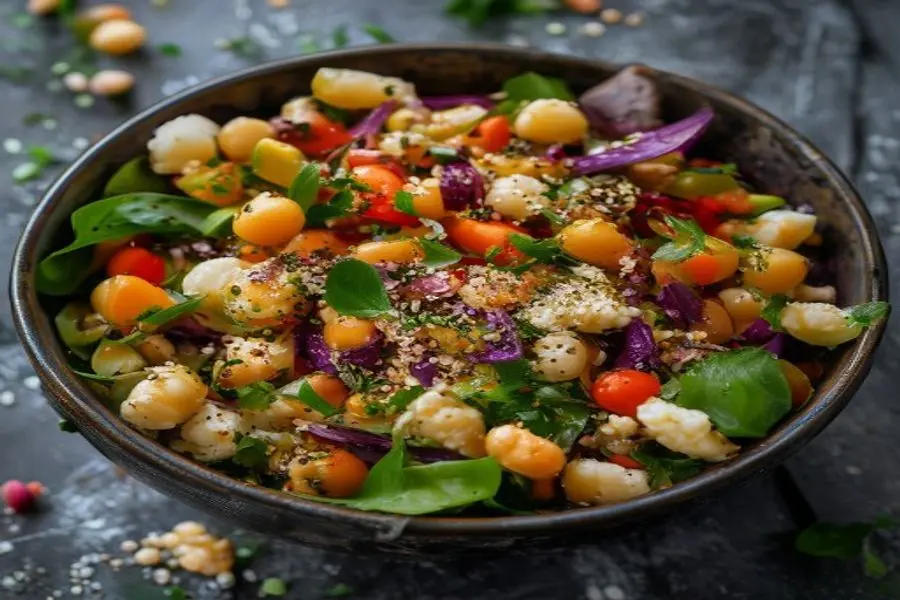
Salada de Grão de Bico Vibrante: Frescor, Crocância, Inesquecível
Leia mais sobre este assunto incrível em nosso blog.
Ler Artigo
Craft rich, frothy, café-quality lattes at home in minutes! Learn espresso to milk ratios, chef tips & common mistakes for perfect homemade coffee.
Leia mais sobre este assunto incrível em nosso blog.
Ler Artigo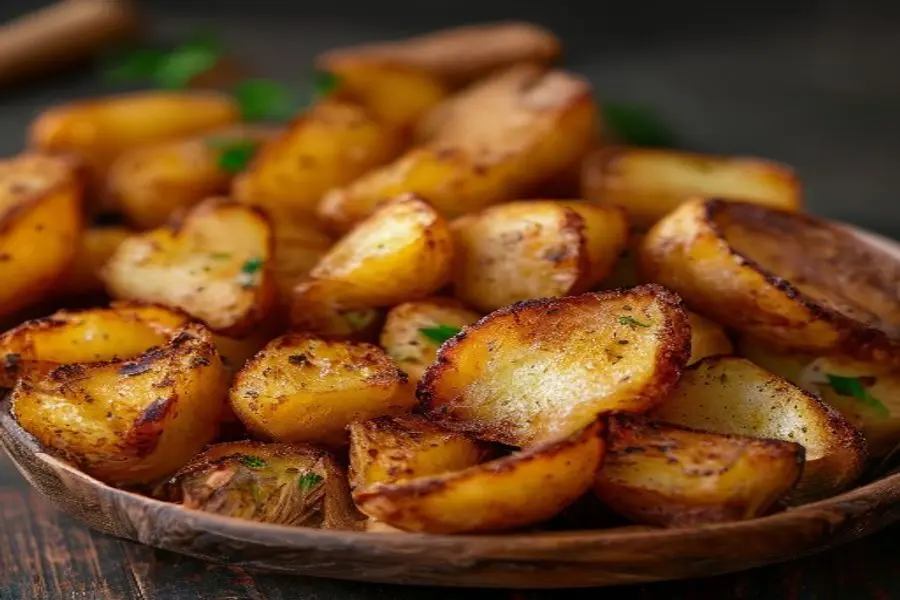
Batatas Assadas Perfeitas: Crocantes por Fora, Fofas por Dentro
Leia mais sobre este assunto incrível em nosso blog.
Ler Artigo
Além da Fatia: Técnicas Profissionais para Bolos Uniformes
Leia mais sobre este assunto incrível em nosso blog.
Ler Artigo
Banquete Reconfortante de East London: Dal, Picles & Halva
Leia mais sobre este assunto incrível em nosso blog.
Ler Artigo

Frango Sobras: Saiba O Prazo Exato e Coma Sem Medo
Leia mais sobre este assunto incrível em nosso blog.
Ler Artigo
Flexible Sandwiches: Kid-Friendly, Meatless & Easy Meals
Leia mais sobre este assunto incrível em nosso blog.
Ler Artigo
Scones Dourados & Fofinhos: O Segredo de uma Padaria Acolhedora
Leia mais sobre este assunto incrível em nosso blog.
Ler Artigo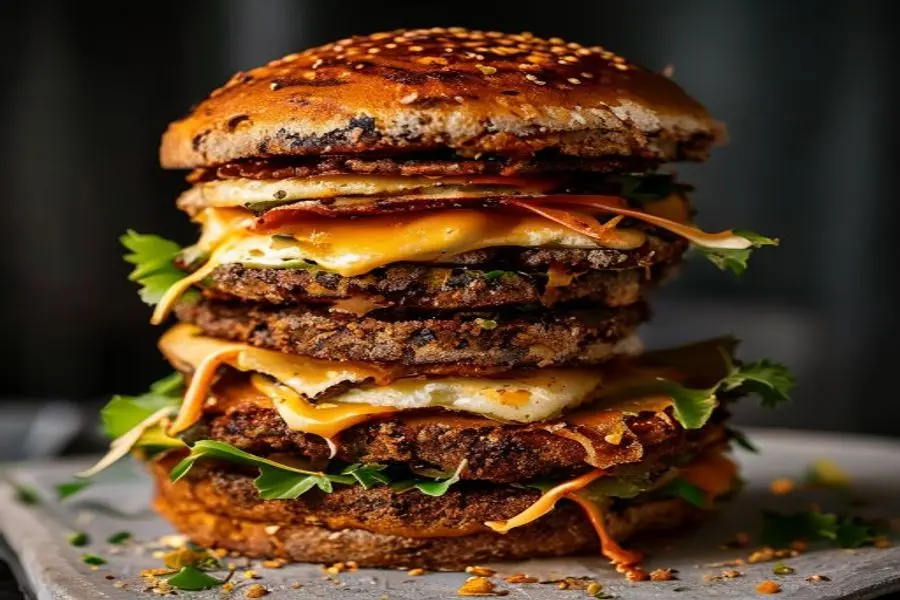
Big Stack Vegano: Crocância e Sabor Incomparáveis da Robin Arzón
Leia mais sobre este assunto incrível em nosso blog.
Ler Artigo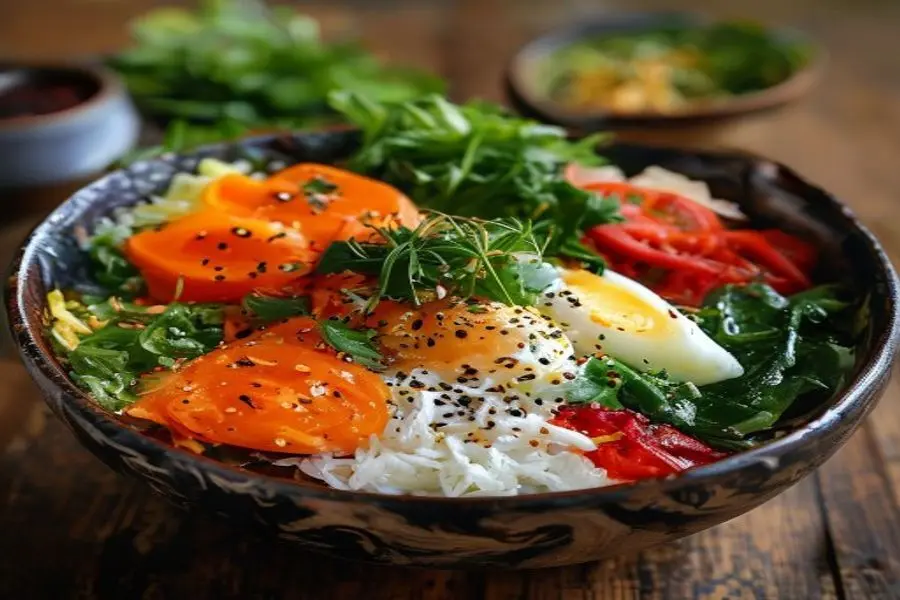
Sabores que Elevam: Bibimbap com Essência da Horta
Leia mais sobre este assunto incrível em nosso blog.
Ler Artigo
Discover the secrets behind Border Town's iconic breakfast taco. Learn to craft this irresistible dish with our chef-approved recipe, tips, and variations for a truly authentic experience.
Leia mais sobre este assunto incrível em nosso blog.
Ler Artigo
Wine for Moms: A Heartfelt Gift Guide
Leia mais sobre este assunto incrível em nosso blog.
Ler Artigo
Assado de Bandeja Dourada: Sabor Rápido, Sem Estresse
Leia mais sobre este assunto incrível em nosso blog.
Ler Artigo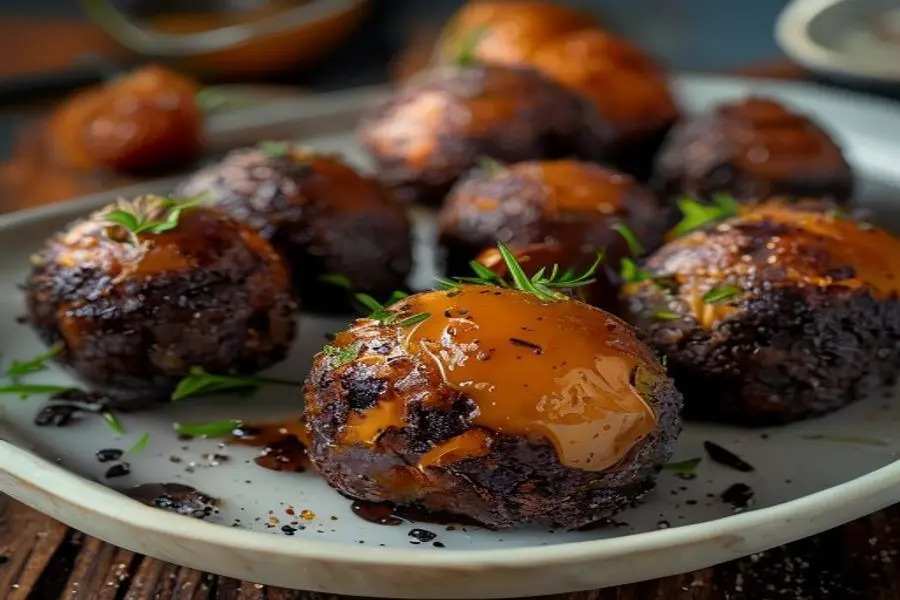
Dominando o Scotch Egg de Black Pudding Perfeito
Leia mais sobre este assunto incrível em nosso blog.
Ler Artigo
Magret Perfeito: Crocância Divina, Sabor Inesquecível em Casa
Leia mais sobre este assunto incrível em nosso blog.
Ler Artigo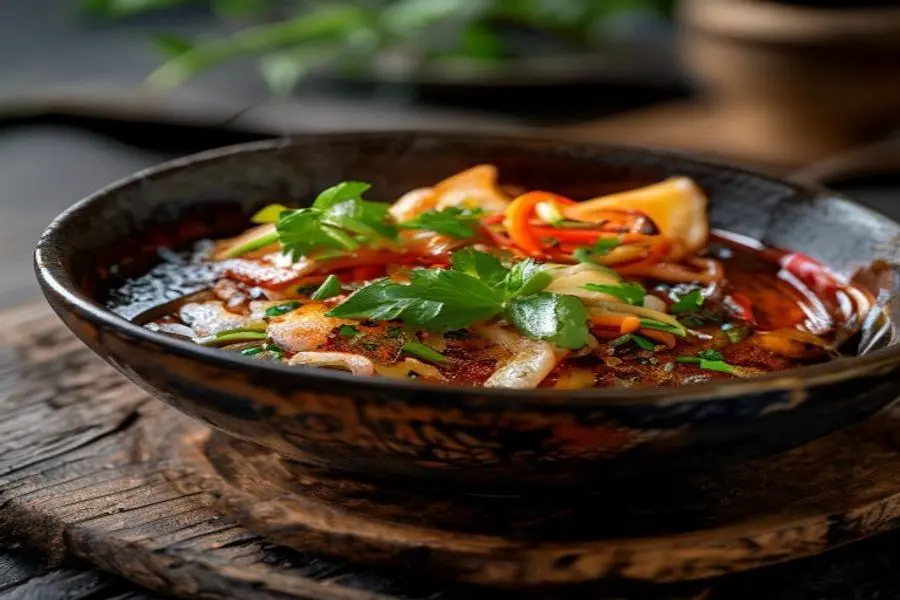
Deseja o McTeriyaki Japonês? Faça o Seu Melhor em Casa!
Leia mais sobre este assunto incrível em nosso blog.
Ler Artigo

Pistachio Almond Easter Nests: Wholesome Crunchy Treat
Leia mais sobre este assunto incrível em nosso blog.
Ler Artigo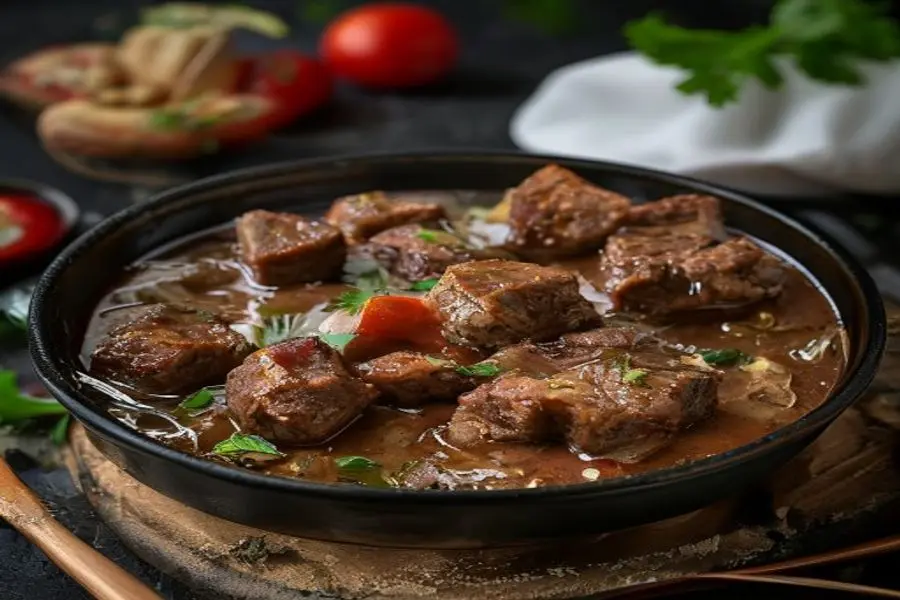
Domine o autêntico Boeuf Bourguignon com dicas de especialistas. Este guia detalhado revela os segredos dos chefs franceses para um prato perfeito e saboroso.
Leia mais sobre este assunto incrível em nosso blog.
Ler Artigo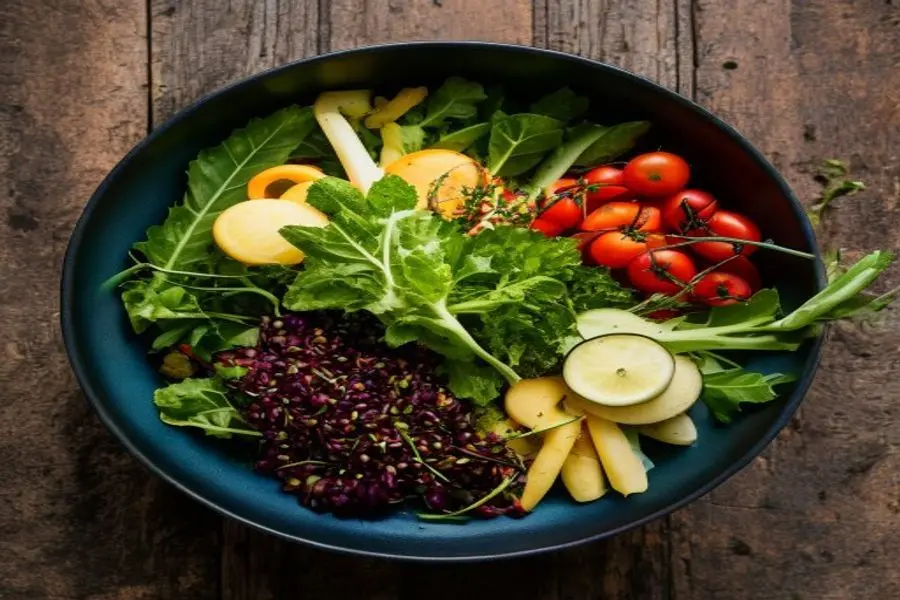
Discover the art of crafting vibrant, fresh dishes directly from local farm bounty, inspired by the 'single-farm' philosophy.
Leia mais sobre este assunto incrível em nosso blog.
Ler Artigo
Spiced Mini Cake Recipe: Unforgettable Texture & Flavor
Leia mais sobre este assunto incrível em nosso blog.
Ler Artigo
Discover the secrets to crafting exquisite Golden Vol-au-Vents, a perfect blend of flaky pastry and savory smoked salmon filling. Elevate your culinary skills and captivate guests with this truly irresistible appetizer for any special occasion.
Leia mais sobre este assunto incrível em nosso blog.
Ler Artigo
Discover the Hibiscus Ginger Refresher, a complex and delicious mocktail. Perfect for those seeking premium, alcohol-free options, easy to make at home.
Leia mais sobre este assunto incrível em nosso blog.
Ler Artigo
Torrada de Ricota Gourmet: Café da Manhã de Villa em Casa
Leia mais sobre este assunto incrível em nosso blog.
Ler Artigo
Homemade Morning Flakes: Healthier, Crispier Breakfast Cereal
Leia mais sobre este assunto incrível em nosso blog.
Ler Artigo
Tomato Galette Recipe: Flaky Crust, Peak Summer Flavor
Leia mais sobre este assunto incrível em nosso blog.
Ler Artigo
Master award-winning Fluffy Ricotta Pancakes with berry compote! This chef-crafted recipe guarantees a memorable, restaurant-quality Mother's Day brunch at home. Perfect for special occasions.
Leia mais sobre este assunto incrível em nosso blog.
Ler Artigo
O Hambúrguer Perfeito: Sabor de Rei, Feito em Casa
Leia mais sobre este assunto incrível em nosso blog.
Ler Artigo
Master Father's Day brunch! Discover the Gourmet Green Eggs & Ham Frittata recipe, chef tips & menu ideas for a memorable feast. Perfect for any dad.
Leia mais sobre este assunto incrível em nosso blog.
Ler Artigo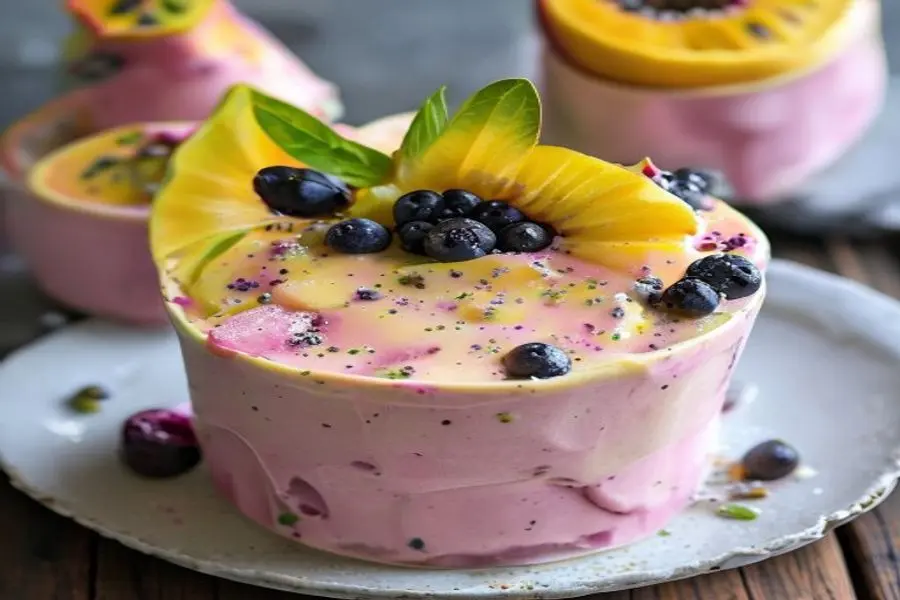
Dia das Mães: Mousse de Maracujá que Derrete na Boca
Leia mais sobre este assunto incrível em nosso blog.
Ler Artigo
Creamy Tomato Pasta: 15-Minute Recipe for Busy Parents
Leia mais sobre este assunto incrível em nosso blog.
Ler Artigo
Transform your kitchen with a simple $3 dishpan! Learn how this affordable hack creates an efficient, organized sink routine for any home chef. Say goodbye to dish clutter!
Leia mais sobre este assunto incrível em nosso blog.
Ler Artigo
Deliciosos Egg Bites: Seu Upgrade Proteico Matinal
Leia mais sobre este assunto incrível em nosso blog.
Ler Artigo
Coq au Vin de Bistrô: Sabores Ricos para Noites Inesquecíveis
Leia mais sobre este assunto incrível em nosso blog.
Ler Artigo
Néctar de Maracujá Vibrante: Pura Alegria Tropical
Leia mais sobre este assunto incrível em nosso blog.
Ler Artigo
Sirloin Cuts Guide: Ribeye, Prime Rib & Florentine Steak
Leia mais sobre este assunto incrível em nosso blog.
Ler Artigo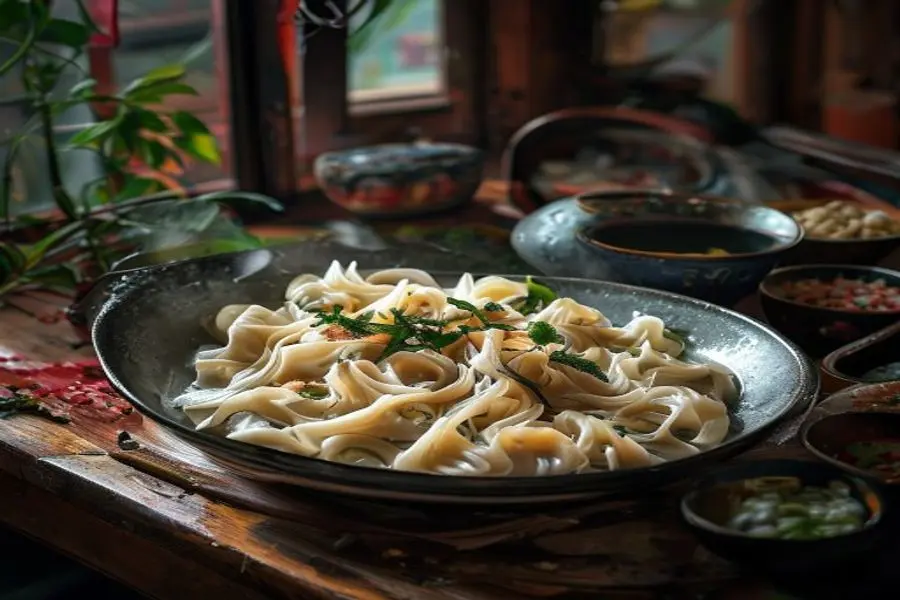
Master the art of street-style Cheung Fun with our expert guide. Experience the slippery, supple rice rolls and vibrant sauces, a true taste of Hong Kong made easy.
Leia mais sobre este assunto incrível em nosso blog.
Ler Artigo
Artisan Bagels: Crisp-Chewy Perfection Praised by Zimmern
Leia mais sobre este assunto incrível em nosso blog.
Ler Artigo
Palak Paneer Caseiro: Eleve Seu Banquete Indiano
Leia mais sobre este assunto incrível em nosso blog.
Ler Artigo
Espresso Caseiro: Vale o Investimento? Técnica e Sabor
Leia mais sobre este assunto incrível em nosso blog.
Ler Artigo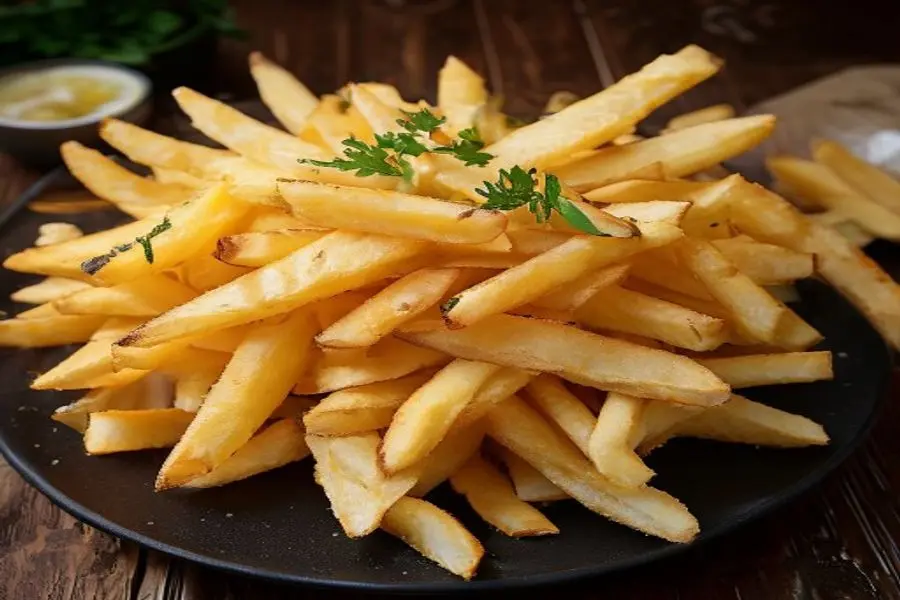
Master the art of perfectly crispy homemade fries with our chef-approved double-fry method. Elevate your meals with this golden, irresistible recipe!
Leia mais sobre este assunto incrível em nosso blog.
Ler Artigo
Elevate your dining experience with our Vineyard Roast Chicken. This exquisite recipe, featuring sweet grapes and a rich wine reduction, promises gourmet flavor.
Leia mais sobre este assunto incrível em nosso blog.
Ler Artigo

Brilho Glacê: Donuts Leves Que Derretem na Boca
Leia mais sobre este assunto incrível em nosso blog.
Ler Artigo
Bife na Air Fryer Perfeito: Crocante por Fora, Suculento por Dentro
Leia mais sobre este assunto incrível em nosso blog.
Ler Artigo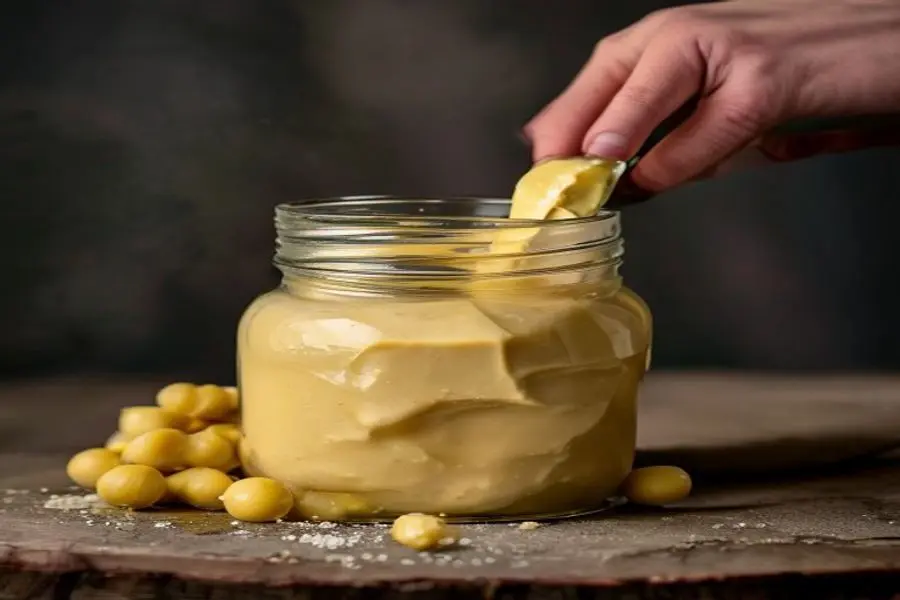
Elevate your cooking with our expert guide to jarred butter beans. Learn chef tips, avoid common errors, and create irresistible, creamy bean dishes today!
Leia mais sobre este assunto incrível em nosso blog.
Ler Artigo
Unlock the secret to irresistibly tender, caramelized miso-peanut hibachi chicken. A chef-approved recipe for incredible flavor, perfect for any weeknight or special occasion.
Leia mais sobre este assunto incrível em nosso blog.
Ler Artigo
Cachorros-Quentes Mega Carne: Refeições Rápidas e de Qualidade
Leia mais sobre este assunto incrível em nosso blog.
Ler Artigo
Master delicate coconut pandan crepes with Genevieve Ko's recipe. Perfect for Mother's Day, brunches, or desserts. Get chef tips, variations, and storage advice.
Leia mais sobre este assunto incrível em nosso blog.
Ler Artigo
Stout Float Recipe: Creamy, Boozy & Easy Summer Treat
Leia mais sobre este assunto incrível em nosso blog.
Ler Artigo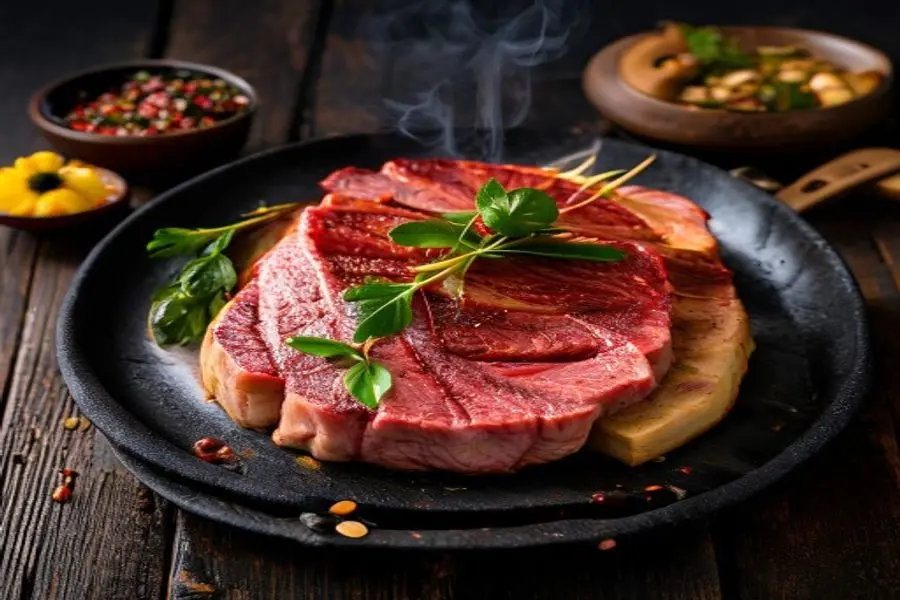
Master authentic Brazilian Picanha churrasco with our expert guide. Unlock secrets to juicy, flavorful grilled top sirloin cap, perfect for any BBQ celebration. Tips, tricks & more!
Leia mais sobre este assunto incrível em nosso blog.
Ler Artigo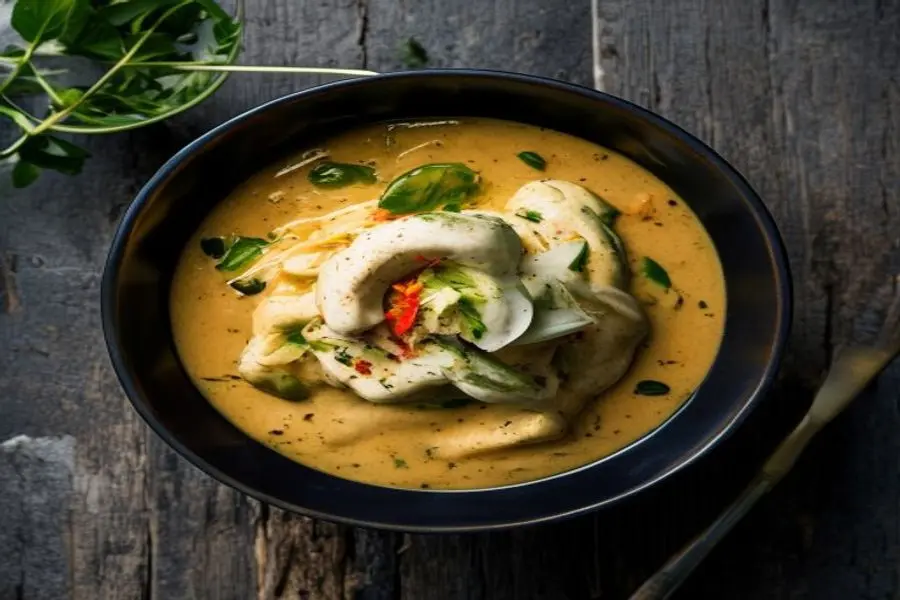
Unlock vibrant Southeast Asian flavors with this easy, creamy, and spicy peanut dipping sauce. Perfect for grilled meats, tenders, & rolls. Get the best recipe!
Leia mais sobre este assunto incrível em nosso blog.
Ler Artigo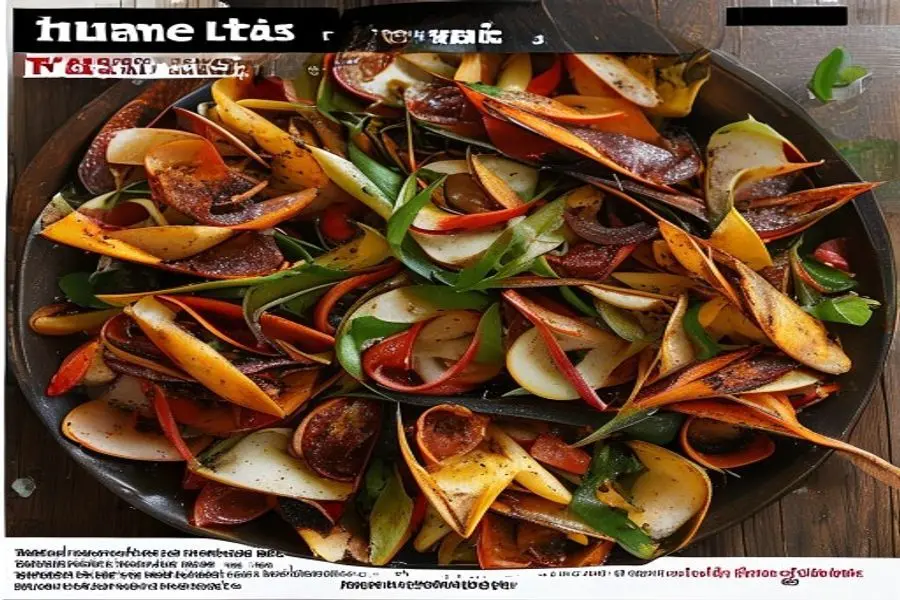
Homemade Chicken Fajitas: Your Ultimate Tex-Mex Guide
Leia mais sobre este assunto incrível em nosso blog.
Ler Artigo
<h2>Unlocking Steakhouse Luxury at Home</h2>\n<p>There's an undeniable allure to the steakhouse experience: the rich aroma, the clinking of glasses, and above all, that perfectly seared, juicy rib-eye. This recipe brings the essence of that indulgence directly to your home kitchen. It’s designed for anyone craving restaurant-quality steak without the steep price tag, offering both comfort and culinary mastery in every bite. Prepare to transform your next meal into a memorable occasion, enjoying premium taste at home.</p>\n<p>Forget the myth that exceptional steak belongs solely to professional chefs or exclusive eateries. This guide empowers home cooks to achieve a sublime rib-eye with simple techniques and readily available ingredients. Whether you are celebrating a special moment, treating yourself after a long week, or simply want to impress guests, this method guarantees a steakhouse-worthy result. Dive into a world of incredible flavor and perfect texture, easily achievable by anyone.</p>\n<p>This approach to rib-eye isn't just about cooking; it's about crafting an experience. It’s ideal for those who appreciate the finer details in food and enjoy the process of creating something truly delicious. The robust flavor of the rib-eye, combined with a flawless sear and tender interior, is a guaranteed crowd-pleaser. Prepare for a culinary journey that evokes cherished memories of classic dining, right in your own dining room, with minimal fuss and maximum impact.</p>\n\n<h2>Why This Rib-Eye Recipe Excels</h2>\n<p>This rib-eye steak recipe consistently wins over palates due to its brilliant simplicity and spectacular results. It focuses on amplifying the natural richness of the beef, creating a deep, caramelized crust while maintaining an incredibly tender, juicy interior. The balance of a high-heat sear followed by aromatic basting ensures every mouthful delivers a complex and satisfying taste. It’s the closest you’ll get to a professional steakhouse sear at home, achieving that perfect balance effortlessly.</p>\n<p>In simple terms: the success of this method lies in maximizing flavor through a perfectly developed crust and ensuring the steak remains incredibly moist inside. The technique highlights the steak’s quality, allowing its natural marbling and beefy notes to shine through. It’s practical because it uses straightforward steps yet yields an impressively sophisticated dish. This recipe promises a culinary triumph without unnecessary complications, making it a favorite for many seeking a premium meal.</p>\n\n<h2>Explained Ingredients for Perfection</h2>\n<ul>\n <li><strong>Rib-Eye Steak (1.5-2 inches thick):</strong> The undisputed star, chosen for its generous marbling of fat, which renders during cooking, infusing the meat with unparalleled flavor and juiciness. Select a high-quality cut for superior results.</li>\n <li><strong>Coarse Salt (Maldon or sea salt):</strong> Essential for deeply seasoning the meat and aiding in the formation of that coveted caramelized crust. Salt not only enhances flavor but also draws out surface moisture, promoting better browning.</li>\n <li><strong>Freshly Ground Black Pepper:</strong> Adds a touch of aromatic spiciness, complementing the steak's richness without overwhelming it. Grinding fresh ensures maximum potency and a vibrant, robust flavor profile.</li>\n <li><strong>High Smoke Point Vegetable Oil (like sunflower or canola):</strong> Necessary for achieving the high temperatures required for a perfect sear without burning. A thin layer prevents sticking and promotes an even, golden-brown crust.</li>\n <li><strong>Unsalted Butter:</strong> Added towards the end of cooking to create a rich, aromatic basting liquid. Butter imparts a luxurious, nutty flavor and helps develop an appealing golden color on the steak's exterior.</li>\n <li><strong>Garlic (2-3 cloves, smashed):</strong> Releases a wonderful aroma that permeates the basting butter, infusing the steak with savory, warm notes. Simply smashing the cloves allows their essence to release without burning.</li>\n <li><strong>Fresh Thyme and Rosemary (a few sprigs):</strong> Aromatic herbs that, when added to the hot butter, release essential oils, elevating the steak's flavor profile with earthy and herbaceous freshness. They contribute to a classic steakhouse fragrance.</li>\n</ul>\n\n<h2>Step-by-Step Masterclass</h2>\n<ol>\n <li><strong>Prepare the Steak:</strong> Remove the rib-eye from the refrigerator at least 30-40 minutes before cooking. Pat it completely dry with paper towels. Season generously on both sides with coarse salt and freshly ground black pepper. The steak should be at room temperature for even cooking.</li>\n <li><strong>Heat the Skillet:</strong> Place a cast-iron skillet (or another heavy-bottomed pan) over medium-high heat. Add the vegetable oil and wait until it is shimmering and just beginning to smoke lightly. Intense heat is crucial for creating that perfect, deep crust on your steak.</li>\n <li><strong>Initial Sear:</strong> Carefully place the rib-eye in the hot skillet. Do not move the steak for 2-3 minutes to allow a deep, golden-brown crust to form. The sizzling sound should be constant and vigorous during this initial searing stage.</li>\n <li><strong>Flip and Continue Sear:</strong> Flip the steak and sear the other side for another 2-3 minutes. This is when the second crust begins to develop. Reduce the heat to medium and add the unsalted butter, smashed garlic, and sprigs of thyme and rosemary to the skillet.</li>\n <li><strong>Baste the Steak:</strong> Tilt the skillet and, using a spoon, begin to baste the steak with the melted, aromatic butter. Continue basting for 2-4 minutes, flipping the steak every minute, until it reaches your desired doneness. Use a meat thermometer for precise results.</li>\n <li><strong>Rest the Meat:</strong> Remove the steak from the skillet and transfer it to a cutting board. Tent loosely with aluminum foil and let it rest for at least 5-10 minutes. This step is vital for the juices to redistribute throughout the meat, ensuring maximum succulence.</li>\n <li><strong>Serve:</strong> After resting, slice the rib-eye against the grain into medium-thick slices. Serve immediately with your favorite accompaniments and, optionally, with any remaining pan sauce from the skillet. Enjoy your perfectly cooked steakhouse-quality meal.</li>\n</ol>\n\n<h2>Chef's Expert Tips</h2>\n<p>For a truly spectacular rib-eye, the secret to this recipe is meticulous attention to temperature. Ensure your skillet is smoking hot before adding the meat, creating that golden, crispy crust. The intense initial heat is what seals in the juices, keeping the interior incredibly moist. Never underestimate the power of a properly heated pan; it is your greatest ally for success in steak cooking.</p>\n<p>The most important tip is always to season your steak generously. Salt and pepper aren't just for flavor; they contribute significantly to the crust's texture. Consider coarse salt, like Maldon, for its ability to create tiny pockets of intense flavor. A steak well-seasoned from the outside in is what distinguishes a good steak from an extraordinary one, capturing the true essence of a steakhouse experience.</p>\n<blockquote>The expert culinary tip for a sublime rib-eye is to never skip resting the meat, allowing the juices to redistribute for unparalleled succulence and flavor throughout.</blockquote>\n<p>The professional technique is the process of basting the steak with aromatic butter. This not only adds complex, buttery flavor but also helps to cook the interior more evenly. Use the aromas of garlic, thyme, and rosemary to infuse the butter, transforming every drop into a flavorful elixir that elevates the steak from good to unforgettable. It's a small step with a gigantic impact on the final delicious result.</p>\n\n<h2>Common Rib-Eye Mistakes</h2>\n<ul>\n <li><strong>Cooking a Cold Steak:</strong> The most common error is placing a steak straight from the refrigerator into the pan. This prevents even cooking, resulting in a charred exterior and a raw or undercooked interior. Always let the meat come to room temperature before cooking.</li>\n <li><strong>Not Properly Drying the Meat:</strong> Moisture on the steak's surface prevents a perfect crust from forming. Instead of searing, the meat will steam. Thoroughly pat your steak dry with paper towels before seasoning and searing for optimal browning and texture.</li>\n <li><strong>Skillet Not Hot Enough:</strong> A cold or lukewarm skillet will not create that crispy, flavorful crust everyone desires. Ensure your skillet is smoking hot before adding the steak, guaranteeing a thermal shock that quickly sears the surface. High heat is non-negotiable for a great sear.</li>\n <li><strong>Flipping the Steak Too Frequently:</strong> The temptation to constantly flip the steak must be resisted. Allow the meat to cook undisturbed on each side for enough time to develop a crust. Moving it too much inhibits the formation of a caramelized, delicious surface.</li>\n <li><strong>Not Resting the Steak:</strong> After cooking, cutting the steak immediately will cause all the valuable juices to run out onto your cutting board. Resting allows the juices to redistribute, resulting in a much juicier and more flavorful steak. It is a crucial step for perfection.</li>\n</ul>\n\n<h2>Recipe Variations</h2>\n<p>For a <strong>gourmet version</strong>, try creating a compound butter with fine herbs, lemon zest, and a touch of chili flakes for an extra flavor kick that melts over the hot steak. You can also experiment with different types of smoked salts or finishing salts for a sophisticated touch. Pair with truffled mashed potatoes for a truly luxurious and memorable dining experience at home.</p>\n<p>A <strong>healthier version</strong> can be achieved by reducing the amount of butter or opting for ghee, which has a higher smoke point and is rich in nutrients. Serve your rib-eye with a generous portion of roasted vegetables or a fresh, crisp salad, ensuring a balanced meal without compromising on flavor. Prioritize lean cuts and mindful portioning to maximize health benefits effectively.</p>\n<p>To elevate the experience into a <strong>special occasion version</strong>, consider finishing your rib-eye with a classic steakhouse sauce, such as a béarnaise or a reduced red wine sauce. Accompaniments like grilled asparagus and scalloped potatoes perfectly complement the richness of the meat, transforming your meal into a true feast worthy of any celebration. Craft an unforgettable culinary event.</p>\n\n<h2>How to Serve and Store</h2>\n<p>Serve your perfectly cooked rib-eye immediately after slicing. Classic accompaniments that complement its richness include creamy mashed potatoes, grilled asparagus, creamed spinach, or a fresh salad to cut through the steak’s opulence. A robust, full-bodied red wine, such as a Cabernet Sauvignon or Malbec, elevates the sensory experience, perfectly complementing the deep, savory flavors of the meat.</p>\n<p>For storing leftovers, cooked rib-eye should be placed in an airtight container in the refrigerator for up to 3-4 days. It is important to cool the meat as quickly as possible after preparation. When reheating, do so gently over low heat or in a preheated oven at 150°C (300°F) to avoid drying it out, perhaps with a splash of beef broth to maintain moisture. Proper storage is essential for food safety and quality.</p>\n\n<h2>SEO Block for Google</h2>\n<p><strong>Prep Time:</strong> 10 minutes</p>\n<p><strong>Cook Time:</strong> 10-15 minutes (depending on desired doneness and thickness)</p>\n<p><strong>Yield:</strong> 1-2 servings (for a 16-20 oz / 450-600g steak)</p>\n<p><strong>Difficulty Level:</strong> Moderate</p>\n<p><strong>Approximate Calories:</strong> 600-850 kcal per serving (varies by cut, preparation, and portion size)</p> META_DESC_EN
Leia mais sobre este assunto incrível em nosso blog.
Ler Artigo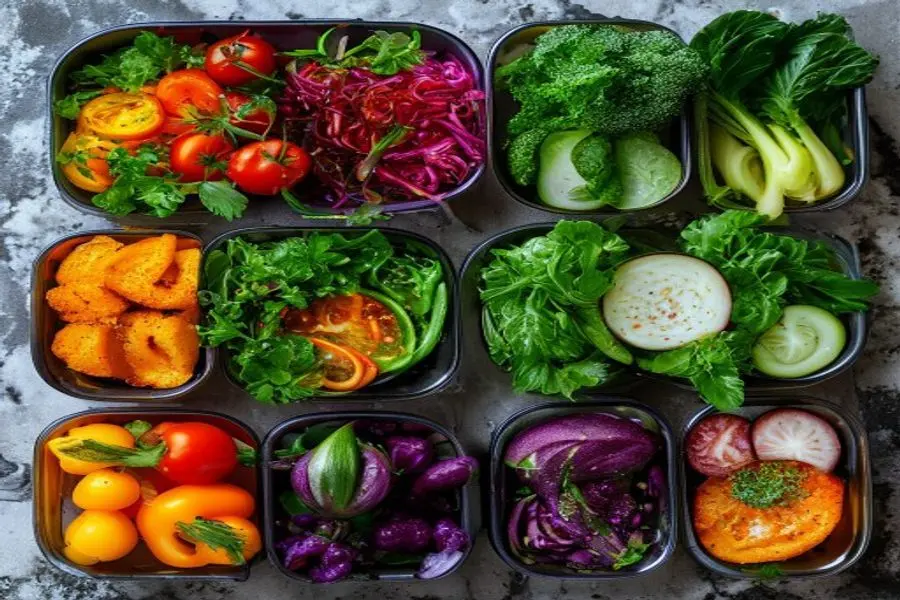
Sabor e Saúde à Mesa: 45 Receitas de Acompanhamentos Vegetais
Leia mais sobre este assunto incrível em nosso blog.
Ler Artigo
Master dim sum at home with our guide to making tender Beef Cheung Fun. Learn chef tips, avoid common errors, and create silky rice rolls that rival top restaurants.
Leia mais sobre este assunto incrível em nosso blog.
Ler Artigo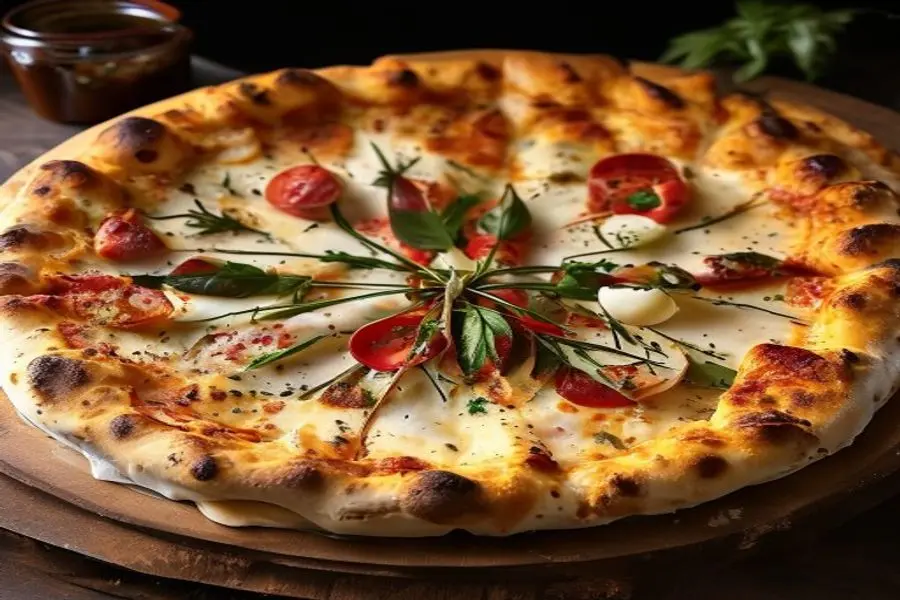
Unlock the secrets to crafting perfect pizza at home, from chewy crust to vibrant toppings. Learn how to make a superior homemade pizza, ensuring safety and gourmet taste.
Leia mais sobre este assunto incrível em nosso blog.
Ler Artigo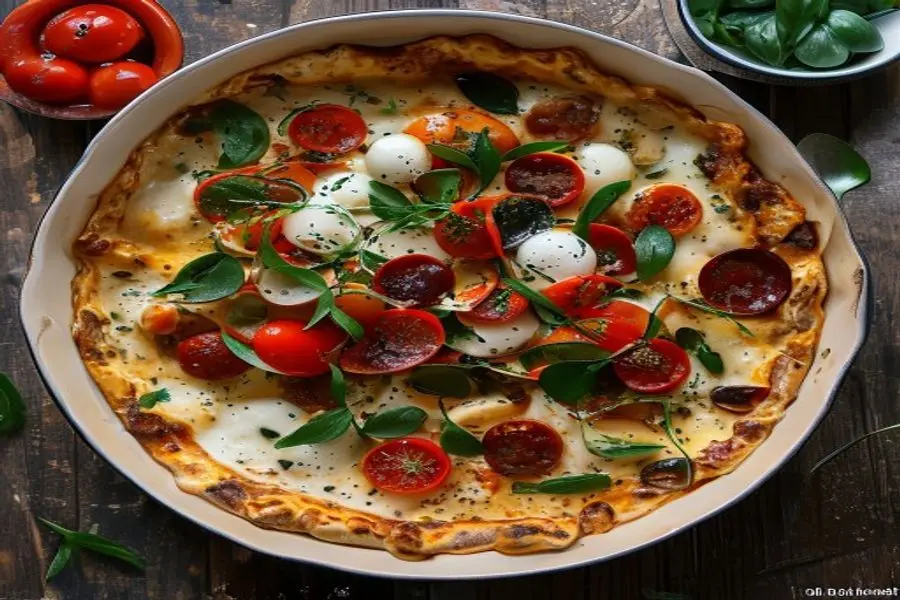
Creamy, Cheesy Pizza Beans Recipe - Easy Skillet Dinner
Leia mais sobre este assunto incrível em nosso blog.
Ler Artigo
Crème Brûlée Caseiro: Casquinha Crocante, Coração Sedoso
Leia mais sobre este assunto incrível em nosso blog.
Ler Artigo
Transforme Pitta Velha: Chips Crocantes, Sem Desperdício
Leia mais sobre este assunto incrível em nosso blog.
Ler Artigo
Beef Croquette Recipe: Crispy Bolinho de Carne at Home
Leia mais sobre este assunto incrível em nosso blog.
Ler Artigo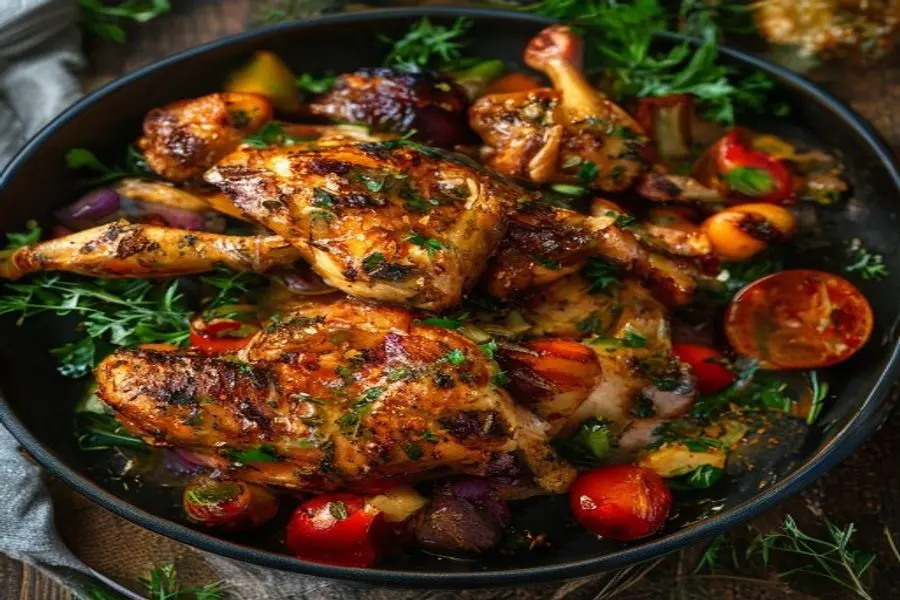
Assado de Frango e Legumes: Jantar Completo em Uma Assadeira
Leia mais sobre este assunto incrível em nosso blog.
Ler Artigo

Crosta Dourada, Miolo Macio: Pretzels Perfeitos em Casa
Leia mais sobre este assunto incrível em nosso blog.
Ler Artigo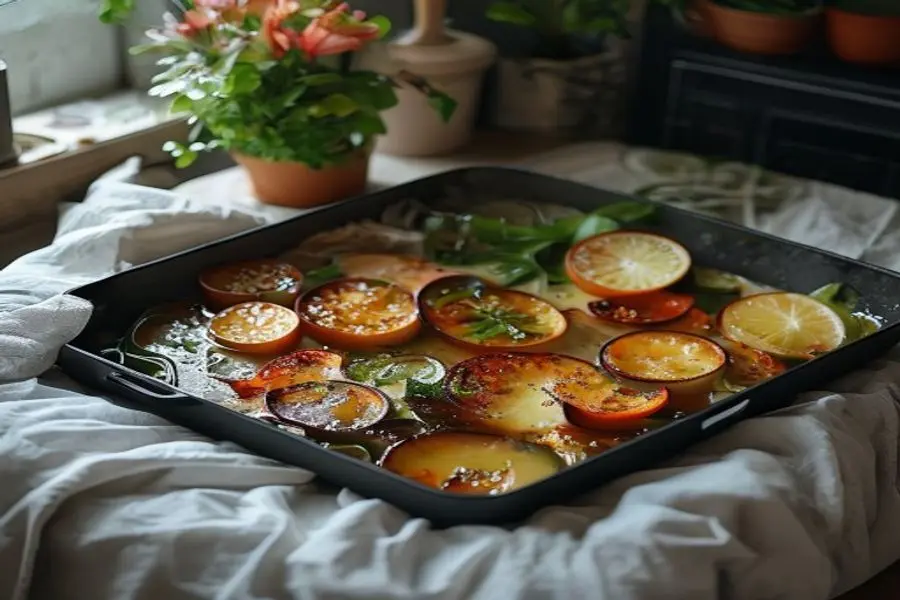
Jantares Sem Esforço: Sua Assadeira É A Nova Melhor Amiga
Leia mais sobre este assunto incrível em nosso blog.
Ler Artigo
Molho Blue Cheese Cremoso: Sabor Irresistível, Sem Erro
Leia mais sobre este assunto incrível em nosso blog.
Ler Artigo
Meta title up to 60 characters: Kitchen Tools Top Chefs Replace: Upgrade Your Cooking
Leia mais sobre este assunto incrível em nosso blog.
Ler Artigo
Golden Mac and Cheese: Best Homestyle Recipe | Chef's Secrets
Leia mais sobre este assunto incrível em nosso blog.
Ler ArtigoA Perfeição das Vieiras: Jantar 3 Estrelas na Sua Cozinha
Leia mais sobre este assunto incrível em nosso blog.
Ler Artigo
Discover where to find the most affordable Guinness pint in America. Our expert guide helps you locate the best value, understand pricing, and savor a quality experience.
Leia mais sobre este assunto incrível em nosso blog.
Ler ArtigoCrispy Churros for Cinco de Mayo: Ultimate Recipe & Tips
Leia mais sobre este assunto incrível em nosso blog.
Ler Artigo